Yes, you can absolutely grow lettuce without soil, and it works remarkably well. Lettuce is actually one of the easiest crops to grow hydroponically because it has a small root system, low nutrient demands, and a fast harvest window of roughly 30 to 45 days from seed. Whether you have a kitchen counter, a spare corner in an apartment, or a dedicated indoor grow space, a simple soilless setup will get you fresh greens faster than most soil-based methods. If you want step-by-step guidance for starting from seed in the UK, including the best timing and indoor setup, this guide on how to grow lettuce from seed UK is a great next place to look.
How to Grow Lettuce Without Soil Indoors: Hydroponics Guide
Marcus Holloway
28 May 2026
Is it actually possible to grow lettuce without soil?
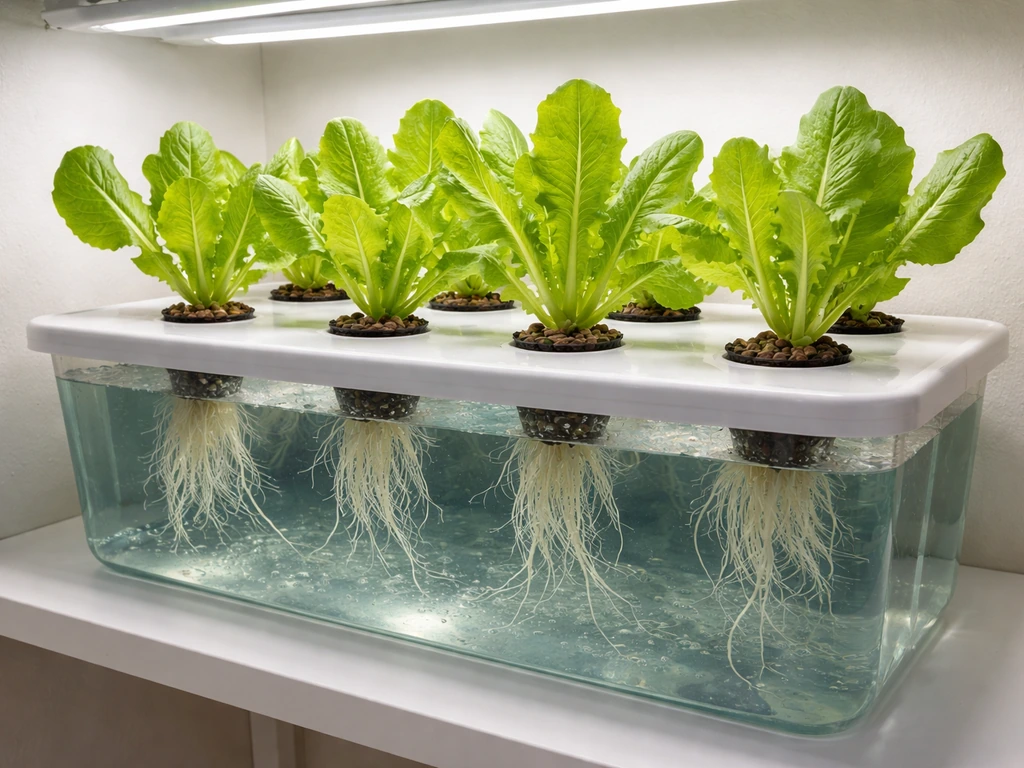
Soil does two things for plants: it anchors them and it delivers nutrients dissolved in water. In a soilless system, you replace both. You use an inert growing medium or a simple support structure to hold roots in place, and you deliver nutrients directly through the water. Lettuce handles this transition better than almost any other vegetable. It does not need deep roots, it thrives in cooler conditions that are easy to manage indoors, and it responds quickly to small adjustments. Commercial lettuce growers moved to hydroponics decades ago for exactly these reasons. At home, you get the same benefits at a much smaller scale.
The one honest caveat: soilless growing has a slightly steeper learning curve than dropping seeds into a pot of compost. You need to pay attention to pH and nutrient concentration in your water, and you need adequate light. Get those right and lettuce almost grows itself. Ignore them and you will run into problems quickly. The good news is that both are easy to monitor with inexpensive tools, and I will walk you through exactly what to target.
The best soilless methods for growing lettuce
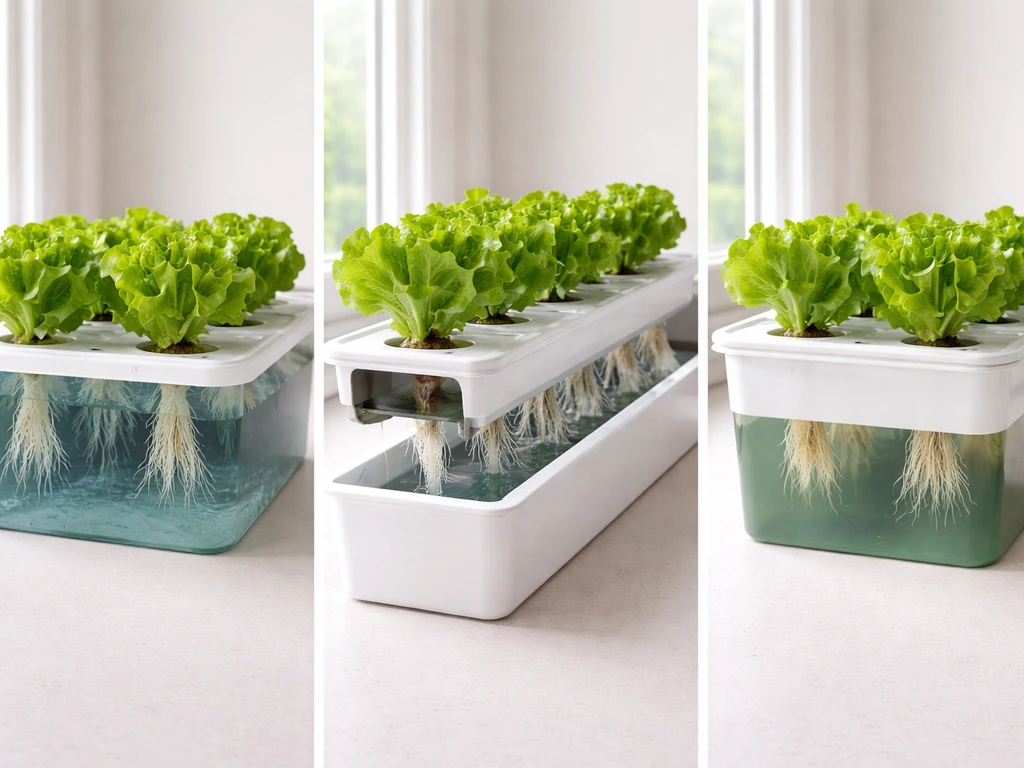
There are three approaches worth knowing about for home growers. Each suits a slightly different situation, so pick the one that matches your space and budget.
Deep Water Culture (DWC)
This is the most beginner-friendly hydroponic method. Plants sit in net pots suspended above a reservoir of nutrient solution, with roots hanging down into the water. A small aquarium air pump keeps the solution oxygenated. You can build a basic DWC system from a storage tote, a handful of net cups, an air pump, and airline tubing for under $30. It is hands-off once running, easy to check, and very forgiving. This is what I recommend if you are starting out.
Nutrient Film Technique (NFT)
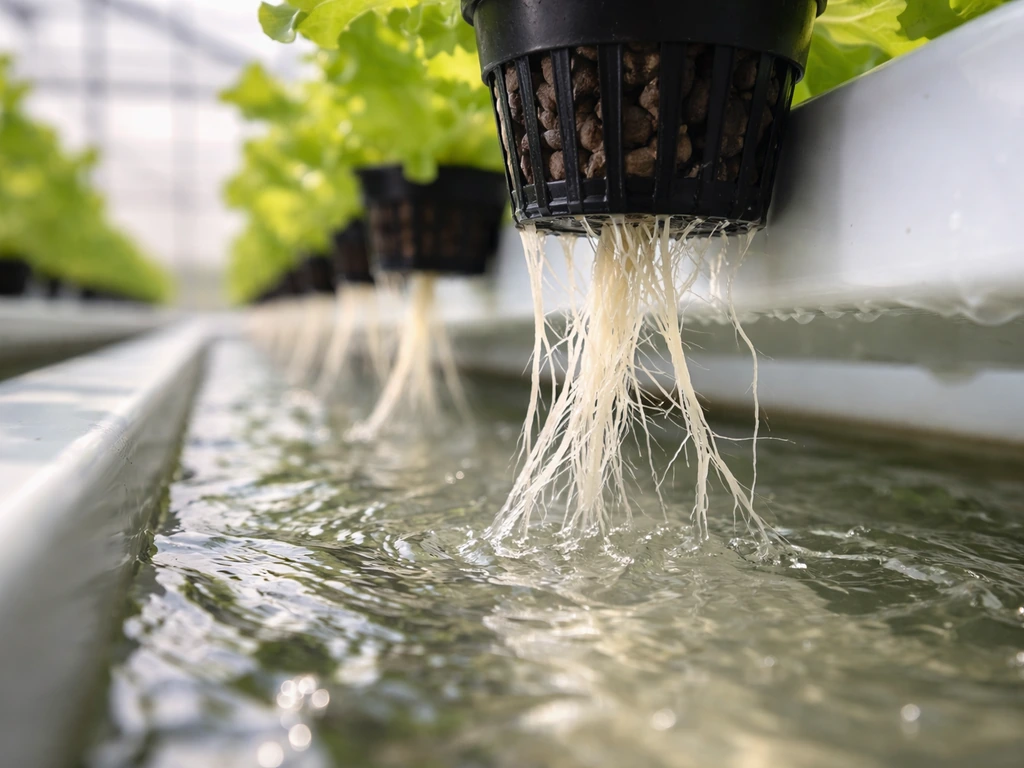
NFT runs a thin, continuous film of nutrient solution through a slightly tilted channel or gutter, past the roots of plants held in net pots. In UF/IFAS EDIS AE610, the NFT lettuce system is described as starting around EC 1.2 dS/m, with nutrient adjustments aligned to lettuce growth stages to improve nutrient uptake efficiency thin, continuous film of nutrient solution. Roots stay moist but mostly exposed to air, which gives them excellent oxygen levels. It is efficient and scales up well. If you want to grow more plants at once, NFT in PVC pipe or purpose-built channels is a natural next step. The main downside is that a pump failure can dry roots out fast, so it is slightly less forgiving than DWC for beginners.
Kratky method (passive hydroponics)
The Kratky method is essentially DWC without the pump. You fill a container with nutrient solution, suspend plants above it, and let the water level drop as the plant drinks it, leaving an air gap that the roots grow into for oxygen. No electricity needed beyond your grow light. It is the simplest possible setup and works well for a few heads of lettuce at a time. The limitation is that you cannot easily adjust nutrients mid-cycle, so it suits loose-leaf types with a faster turnover better than large, slow-heading varieties.
Aeroponics
Aeroponics mists roots with nutrient solution at timed intervals, delivering maximum oxygen and nutrients simultaneously. It produces very fast growth, and research shows root-zone temperatures around 18 to 22°C in aeroponic systems give excellent results for lettuce. The downside is cost and complexity. Aeroponic systems require reliable misters and timers, and a clog or power cut causes rapid root stress. I would not recommend it as a first system, but it is worth knowing about as you progress.
| Method | Skill Level | Startup Cost | Power Required | Best For |
|---|---|---|---|---|
| Deep Water Culture (DWC) | Beginner | Low ($20-$40 DIY) | Yes (air pump) | First-time growers, small harvests |
| Kratky (passive) | Beginner | Very low ($10-$20) | No (just grow light) | Minimal setup, loose-leaf varieties |
| NFT | Intermediate | Medium ($50-$150+) | Yes (water pump) | Higher plant counts, ongoing production |
| Aeroponics | Advanced | High ($150+) | Yes (pump + timer) | Maximum growth speed, experienced growers |
Setting up your indoor environment: lights, temperature, and airflow
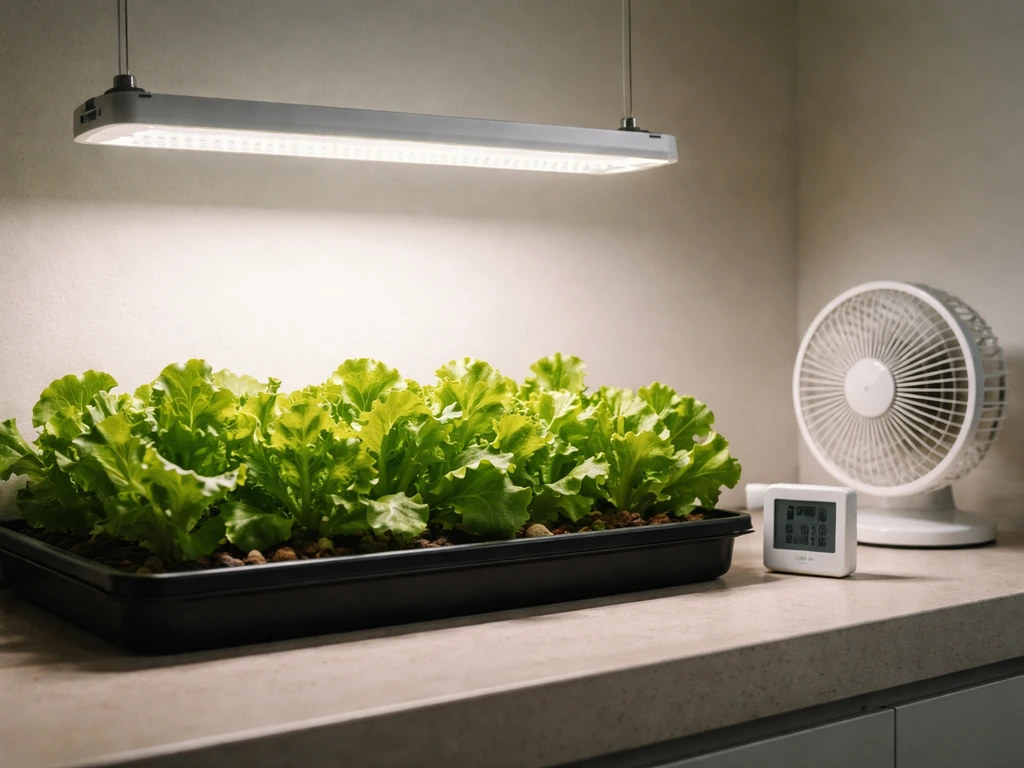
Getting the environment right matters more indoors than outdoors, because your plants depend entirely on what you provide. Here is what to target.
Light
Lettuce needs around 12 to 16 hours of light per day when grown indoors. Natural windowsill light is rarely enough, especially in winter or in apartments with limited south-facing exposure. If you are specifically working with a windowsill, you may need a stronger grow light to reach the hours lettuce requires how to grow lettuce on a windowsill. A dedicated LED grow light targeting a photosynthetic photon flux density (PPFD) of around 300 to 400 µmol/m²/s at canopy level is the sweet spot for lettuce. Full-spectrum LED panels designed for leafy greens are widely available and relatively affordable. Keep the light 15 to 30 cm above the plant canopy and adjust as plants grow. Running the light on a simple timer at 14 to 16 hours on, 8 to 10 hours off gives consistent results. If you notice plants getting leggy or stretching toward the light, it is almost always a sign the light is too dim or too far away.
Temperature
Lettuce is a cool-weather crop. Aim for an air temperature between 15 and 22°C (59 to 72°F) in your grow space. Above 24°C the plant starts to stress and bolt risk increases. The root zone temperature matters too: research puts the optimal root-zone temperature at roughly 18 to 22°C for soilless systems. In practice, if your reservoir water sits in a room at normal indoor temperature (18 to 21°C), you are usually within range. In summer, a water chiller or frozen water bottles can help if your reservoir warms up.
Airflow
A small fan running on low is genuinely important, not optional. Good air movement serves two functions: it strengthens stems by providing gentle resistance, and it promotes evapotranspiration from leaves. That second point matters a lot because lettuce tipburn, one of the most common indoor problems, is caused not by a lack of calcium in your solution but by the plant failing to move calcium into rapidly expanding leaf tissue due to low transpiration. A gentle breeze over the canopy significantly reduces tipburn. An oscillating desk fan aimed to move air around the plants (not blasting directly at them) is all you need.
Step-by-step: from seeds to a working soilless system
- Choose your variety. Loose-leaf types like Black Seeded Simpson, Buttercrunch, or any 'cut-and-come-again' mix are ideal for beginners. They are faster, more tolerant of imperfect conditions, and you can harvest multiple times. Romaine works well too but takes a little longer.
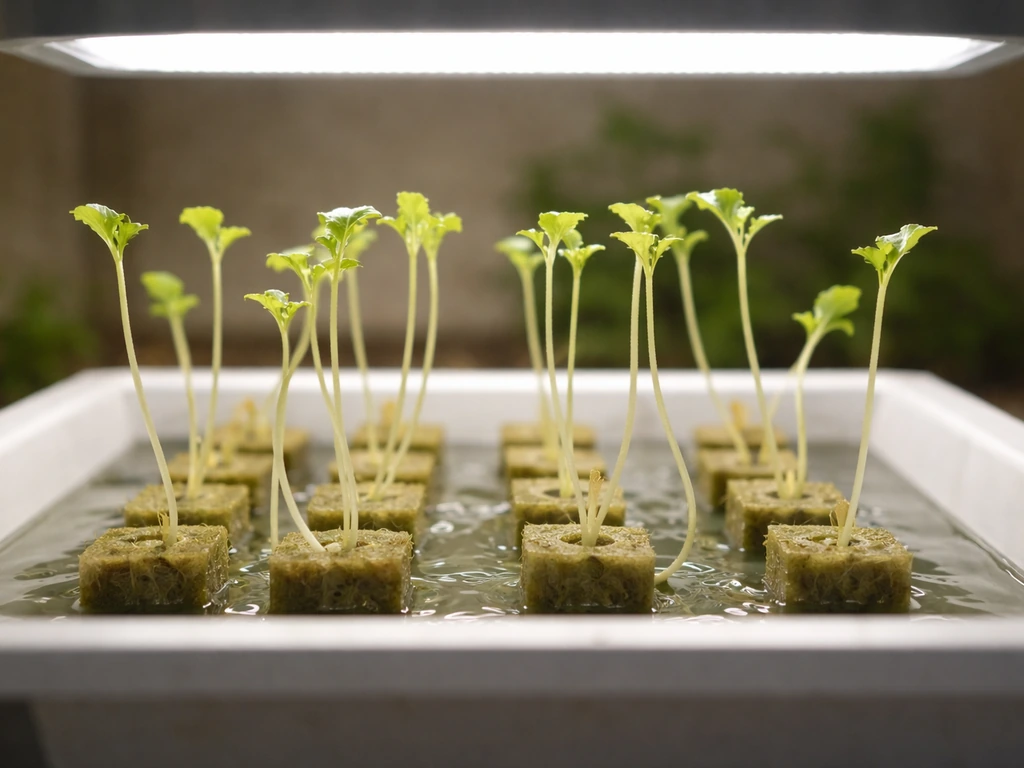
- Start seeds in a growing medium. Rather than starting in potting mix, use rockwool cubes or coco coir plugs sized to fit your net pots (usually 1.5 to 2 inch cubes). Soak rockwool cubes in pH-adjusted water (around 5.5) before use to flush out their naturally high pH. Place one or two seeds per cube, cover lightly with plastic wrap or a humidity dome, and keep them somewhere warm (around 20°C) until germination. Most lettuce germinates in 2 to 5 days.
- Provide seedling light immediately. As soon as sprouts appear, move them under your grow light. Seedlings left without strong light stretch fast. Keep the light closer at this stage (around 20 to 25 cm) since seedlings are small.
- Set up your system. If using DWC, fill your reservoir with plain pH-adjusted water for the first few days while seedlings are tiny, then switch to diluted nutrient solution when the first true leaves appear. Make sure the net pot sits just touching the water surface initially so the starter cube stays moist.
- Transplant seedlings. Once roots are visible emerging from the bottom of the starter cube (usually 7 to 10 days after germination), the seedlings are ready to go into the system. Place the cube into your net pot and backfill around it with hydroton clay pebbles or another inert medium to hold it steady.
- Space plants correctly. Aim for roughly 20 to 25 cm between plants for full heads, or about 15 cm for cut-and-come-again harvesting. Research puts optimal density at around 33 to 36 plants per square metre for commercial systems; home growers can use this as a guide but slightly more space per plant is always safer. Crowding reduces airflow and individual plant size.
- Begin feeding with nutrient solution. Mix your hydroponic nutrients according to the product's feeding chart. Top up the reservoir as the water level drops, and do a full reservoir change every 7 to 10 days to prevent nutrient imbalances.
Watering, feeding, and nutrient basics
Hydroponic lettuce does not need a complex nutrient program. A balanced, three-part liquid nutrient system like General Hydroponics FloraSeries (FloraMicro, FloraGro, FloraBloom) or a simpler two-part formulation designed for leafy greens covers everything lettuce needs. For lettuce, you mostly want a vegetative-focused ratio that is higher in nitrogen, which is what the 'Gro' and 'Micro' parts provide.
The two numbers you need to monitor regularly are pH and electrical conductivity (EC). EC measures the concentration of dissolved nutrients in your solution. For lettuce, target an EC between 1.2 and 1.8 dS/m. Seedlings and young plants do better at the lower end (around 1.2) while maturing plants can handle up to 1.8. Keep solution pH between 5.5 and 6.5, with 5.8 to 6.2 being the sweet spot where all key nutrients are most available. OSU Extension recommends aiming for around pH 5.5 in your mixed solution, as the root-zone environment typically reads slightly higher once measured at the root. A cheap pH and EC meter from any garden or hydroponics supplier makes this quick and easy to check.
If your pH drifts out of range, nutrient lockout happens: the nutrients are in the solution but the plant cannot absorb them. Most nutrient deficiency symptoms in hydroponic lettuce are actually pH problems in disguise. Check pH first before assuming you need to add more of anything.
Simple weekly feeding routine
- Days 1 to 7 (germination): Plain water at pH 5.8 to 6.0. No nutrients yet.
- Days 7 to 14 (seedling stage): Diluted nutrient solution at EC 0.8 to 1.0. Check pH daily.
- Days 14 onwards (vegetative growth): Full-strength lettuce mix at EC 1.2 to 1.6. Check pH every 1 to 2 days. Top up water between reservoir changes.
- Every 7 to 10 days: Full reservoir change with fresh nutrient solution to prevent salt buildup and nutrient imbalance.
- Check EC after topping up: plants drink water faster than nutrients, so EC rises over time. If EC climbs above 1.8, top up with plain pH-adjusted water only.
Timeline: what to expect from germination to harvest
Hydroponic lettuce is genuinely fast. Here is a realistic timeline for common varieties under a proper grow light at 14 to 16 hours per day.
| Stage | Timing | What to Do |
|---|---|---|
| Germination | Days 1 to 5 | Keep starter cubes moist and warm (around 20°C). No light needed until sprouts appear. |
| Seedling (first true leaves) | Days 5 to 14 | Move under grow light immediately. Keep at lower EC. Roots should start emerging from cubes. |
| Transplant into system | Days 7 to 14 | Once roots are visible, move into net pots in your hydroponic system. |
| Active vegetative growth | Days 14 to 30 | Plants should visibly grow daily. Thin to final spacing if starting multiple seeds per cube. |
| First harvest (cut-and-come-again) | Days 25 to 35 | Harvest outer leaves once plants are 10 to 15 cm tall. Leave the centre to keep producing. |
| Full head harvest | Days 35 to 45 | For butterhead or romaine types, harvest the full plant. Loose-leaf can continue producing for several more weeks. |
If your lettuce is taking significantly longer than 45 days to reach harvest size, light is almost always the reason. Dim or insufficient light is the single biggest growth-limiter in indoor soilless setups.
Thinning is straightforward: if you started two seeds per plug and both germinated, snip the weaker seedling at the base with scissors at the seedling stage (around day 10). Do not pull it out, as this can disturb the surviving plant's roots.
When things go wrong: troubleshooting common problems
Leggy, stretched seedlings
If seedlings are stretching upward with long gaps between leaves, the light is too dim or too far away. Move the grow light closer, or switch to a brighter bulb. This is the most common beginner issue. Leggy seedlings can be salvaged but they start at a disadvantage, so better to correct the light situation before the next batch.
Tipburn (brown leaf edges)
Tipburn shows up as brown or papery edges on inner leaves, most often during fast growth phases. It looks like a nutrient problem but it is actually a calcium transport issue caused by low transpiration. Calcium moves through a plant with water movement, and if air is still and humidity is high, leaves do not transpire enough to pull calcium into rapidly expanding tissue. The fix is better airflow: add or increase your fan. Slightly reducing humidity and keeping temperatures on the cooler side of the range also helps. Do not reflexively add more calcium to your solution unless your EC is already very low.
Root rot and slimy roots
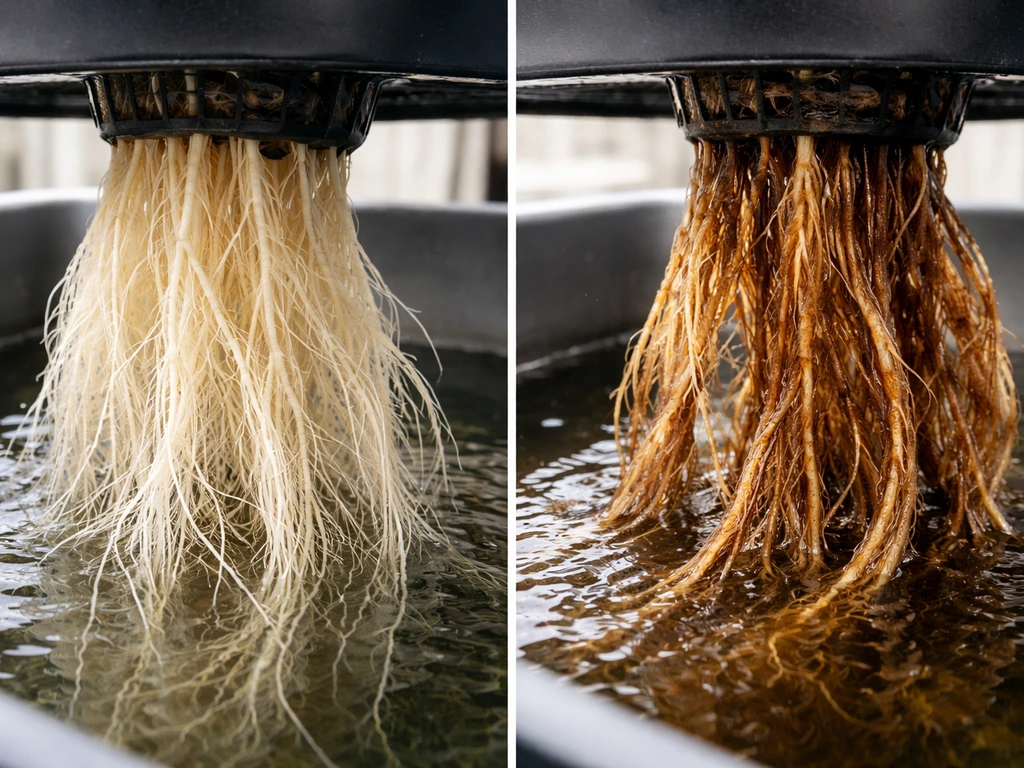
Healthy roots should be white or off-white. Brown, slimy, or smelly roots indicate root rot, usually caused by Pythium or similar pathogens. The triggers are warm solution temperatures (above 22°C), low dissolved oxygen, and poor sanitation. If you catch it early, remove affected roots, reduce solution temperature, increase aeration, and consider adding a beneficial bacteria product like Hydroguard. If the crop is heavily affected, drain the system, rinse everything with a dilute bleach solution, and start fresh. Prevention is easier than cure: keep your reservoir covered to block light (which algae and pathogens love), keep water cool, and never reuse nutrient solution between crops without fully cleaning the system.
Slow growth or pale leaves
Pale or yellowing leaves combined with slow growth almost always point to a nutrient availability issue. Before adding more nutrients, check your pH. If pH is above 6.8 or below 5.5, certain nutrients become locked out even when they are present in the solution. Correct pH first, wait 24 to 48 hours, and see if growth resumes. If pH is fine but growth is still slow, check EC and make sure you are not running too dilute a solution, especially in cooler rooms where plants may be putting on slow but steady growth.
Pests
Indoor soilless systems have far fewer pest problems than outdoor soil gardens. The most likely visitors are fungus gnats (attracted to moist growing media), aphids (can hitch a ride on seedlings or through open windows), and spider mites in hot, dry conditions. Fungus gnats are mostly a nuisance but their larvae can damage roots if populations get large. Yellow sticky traps catch adults. If you are using coco coir plugs, letting the surface dry slightly between waterings deters egg-laying. Aphids respond well to a spray of diluted neem oil or insecticidal soap, applied in the evening away from the light cycle.
Where to go from here: easy next steps for beginners
If you are brand new to soilless growing, start with a Kratky setup or a simple DWC tote. You need a container with a lid, net pots, an air pump (for DWC), rockwool or coco coir starter cubes, a three-part hydroponic nutrient solution, a pH meter, and a grow light. Total cost for a first setup is typically $50 to $80 if you buy individual components, or you can spend a bit more on an all-in-one hydroponic growing kit that bundles everything together.
For varieties, start with a loose-leaf blend or Buttercrunch. Both are fast, forgiving, and give you frequent harvests that keep you motivated while you learn the system. Avoid iceberg and large crisphead types for your first grow: they take longer and are more sensitive to indoor conditions.
Once you have one or two successful grows under your belt, you might want to scale up to a channel-based NFT system, especially if you want a continuous supply. Growing in gutters mounted to a wall or fence is a space-efficient way to run NFT at home and a natural progression from a single-tote beginner system. If you are in an apartment with limited floor space, wall-mounted or vertical setups open up a lot of growing capacity without taking over your living area.
The honest reality is that your first grow will teach you more than any guide can. You will probably have one batch that grows unevenly or develops tipburn, and you will figure out the fix for the next round. That is completely normal. Lettuce cycles are short enough that you can learn fast, and within two or three grows you will have dialled in a system that delivers fresh greens on a consistent schedule, no soil required.
FAQ
In a hydroponic lettuce setup, how often should I change the nutrient solution?
It depends on the system. For Kratky, you mostly top up with pH-adjusted water only if the level drops below the roots, and you avoid adding new nutrients mid-cycle. For DWC, NFT, and aeroponics, you either change the reservoir on a schedule or use partial top-ups plus nutrient and EC recalibration, because nutrients become less available as plants consume them and salts accumulate.
What should I do if my lettuce looks like it has nutrient deficiency even though I added fertilizer?
In hydroponics, “no nutrients” usually means either pH is off, EC is too low, or the root zone lacks oxygen (especially in DWC or any system without strong aeration). Before adding more fertilizer, measure pH and EC, then inspect roots for oxygen problems like browning or a sour smell.
Can I start lettuce in cubes and move it to a hydroponic system later (instead of sowing directly)?
Yes, but timing matters. Use a clean, disease-free starter cube and keep initial EC mild, then gradually bring EC toward the target as plants establish. Also, avoid moving seedlings into a warmer reservoir than they were growing in, because temperature swings can slow growth and increase tipburn risk.
How do I prevent root rot if my indoor room gets warm? (What temperature strategy actually works)?
If the reservoir water gets too warm, you are much more likely to trigger root rot and oxygen stress. A practical approach is to keep the reservoir indoors away from sun, insulate the tote/bucket if needed, and confirm root-zone temperature with a simple probe thermometer rather than guessing by room temperature.
Is it possible to grow lettuce without soil using only a window, not grow lights?
You can, but lettuce will be limited by how much usable light the window provides and by daily light consistency. If you cannot reliably hit the recommended 12 to 16 hours, use a grow light for the missing portion of the photoperiod. Also, rotate trays so plants do not lean or develop uneven canopy growth.
How can I tell tipburn from a true calcium or nutrient problem in hydroponic lettuce?
Brown, papery edges on inner leaves (tipburn) are most often a transpiration issue, not a simple calcium shortage. Start by increasing gentle airflow and keeping humidity moderate, then verify EC is not so high that plants are stressed. Only after pH is within range should you consider adjusting nutrients.
What humidity should I target for indoor soil-free lettuce, and how do I adjust it?
Aim for lettuce-friendly humidity and airflow balance. Too much moisture plus still air increases tipburn and can worsen fungal issues, while very dry air can stress plants and reduce transpiration. A common adjustment is to run a low oscillating fan and, if you track it, keep humidity in a comfortable indoor range rather than very humid conditions.
Can I reuse nutrient solution for the next lettuce grow to save money?
Generally, you should not reuse nutrient solution between batches without a proper clean-out, because microbes and salt residue build up and can cause inconsistent EC and pathogen outbreaks. The safer approach is to dump and clean, then mix a fresh batch to your target EC and pH.
My lettuce is stretching, what changes should I make first (light distance, light duration, or nutrients)?
If you keep seeing leggy growth, the most likely cause is insufficient light intensity or excessive distance between the LEDs and the canopy. Correct it by raising PPFD (closer light, brighter fixture) and keeping the light on a timer that provides the full daily photoperiod. If you change the light height, adjust gradually and observe for 2 to 3 days.
How do I know if my problem is lack of oxygen to the roots rather than a nutrient issue?
Add dissolved oxygen in a measurable way. For DWC, ensure the air pump is strong enough and that the diffusers are working, because poor aeration can happen even when the air pump is running. For NFT, confirm the flow rate is enough that roots stay moist, and check for clogs or uneven channel levels.
When I set up for the first time, should I adjust pH and EC before filling, and do I need to recheck after planting?
Don’t overthink it, but do it correctly: pH adjust the water or nutrient mix before you fill, then recheck after mixing. After transplanting, recheck pH and EC within 24 hours because plant uptake and initial mixing can shift values, especially in small reservoirs.
Why do some lettuce varieties struggle indoors in hydroponics, and what should I choose instead?
Bigger heads usually take longer, and some varieties are less forgiving indoors. For faster cycles and easier success, choose loose-leaf types and Buttercrunch. If you insist on larger crisp varieties, plan to manage light intensity more carefully and expect a longer “dial-in” period.