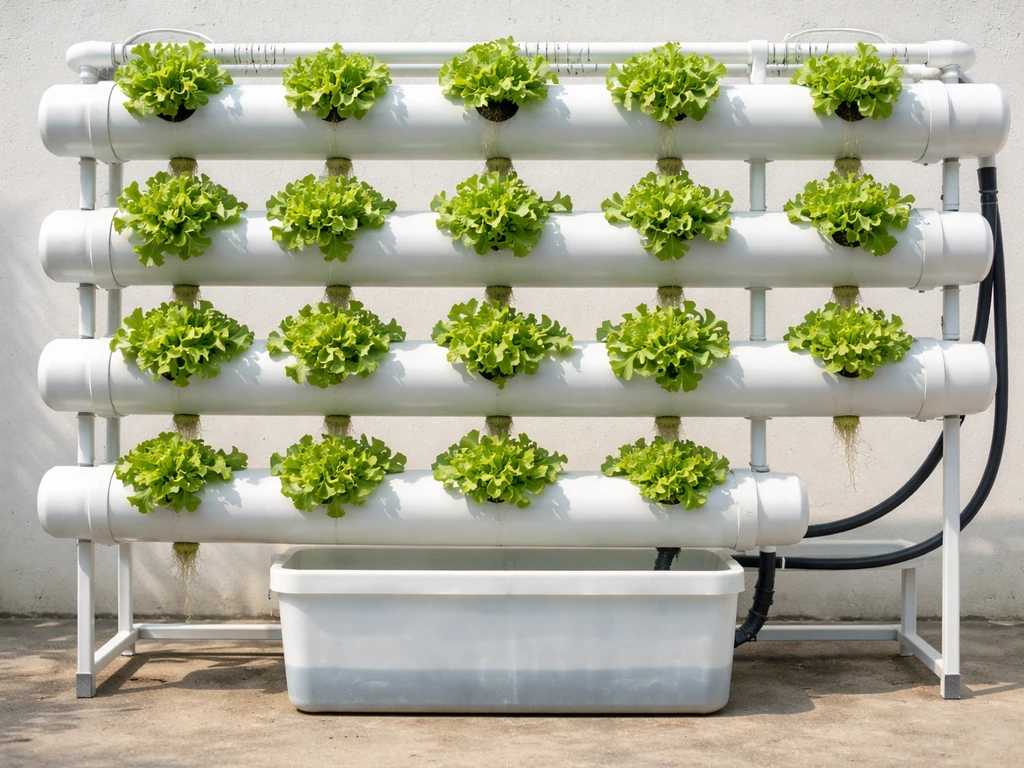
You can grow lettuce in PVC pipes using either a simple top-drip soil-less setup or a full hydroponic NFT (nutrient film technique) channel system, and both work well for home growers. The core idea is the same: cut holes or pockets into a pipe, fill them with plants, and run water or nutrient solution past the roots on a regular schedule. With the right variety (loose-leaf types are your best friend here), the right hole spacing, and consistent watering, you can go from seed to first harvest in as little as 45 days and keep cutting for weeks after that.
How to Grow Lettuce in PVC Pipes: Step-by-Step Guide
Marcus Holloway
15 Jun 2026
Best lettuce varieties for PVC pipe growing
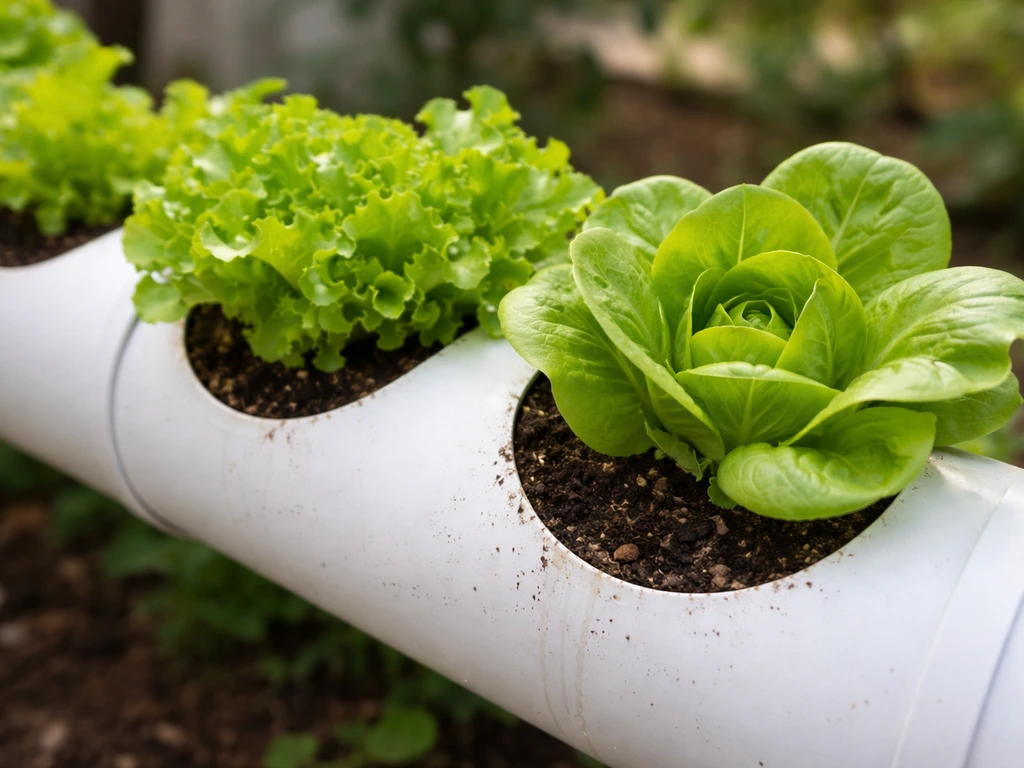
Not every lettuce type is equally suited to a pipe system. The compact root ball and faster maturity of loose-leaf and butterhead types make them the most practical choices. Head lettuces like iceberg need too much space and too much time to work well in a confined pipe hole.
Loose-leaf varieties are the clear winner for PVC pipe gardens. They mature in roughly 45 to 55 days, handle partial shade better than head types, tolerate a wider temperature range, and can be harvested repeatedly with a cut-and-come-again approach. Mississippi State University Extension also reports that leaf lettuce is more cold hardy, faster maturing, and more shade tolerant than head lettuce, with some varieties offering heat tolerance compared with head types handle partial shade better than head types. Varieties like 'Black Seeded Simpson,' 'Oak Leaf,' and 'Red Sails' are reliable performers. Oak-leaf types in particular have good slow-bolting traits, which matters a lot when you're growing in warm indoor spaces or through late spring.
Butterhead varieties like 'Buttercrunch' and 'Tom Thumb' are a solid second choice. They form small, loose heads, mature in about 60 to 70 days, and fit comfortably in a 2-inch net pot or a standard pipe hole. Romaine types are worth considering for fall and winter grows because they generally have better bolt resistance than butterhead or loose-leaf, though they do take longer to mature.
If you're growing through summer or in a warm apartment, prioritize heat-tolerant and slow-bolting labels on the seed packet. Bolting kicks in when temperatures consistently push above 75°F and day length increases, so variety selection is your first line of defense before you even touch the pipe.
| Type | Days to Maturity | Bolt Resistance | Best Season | Pipe Suitability |
|---|---|---|---|---|
| Loose-leaf (Oak Leaf, Red Sails) | 45–55 days | Good (oak-leaf types) | Spring, fall, indoor year-round | Excellent |
| Butterhead (Buttercrunch, Tom Thumb) | 60–70 days | Moderate | Spring, fall | Very good |
| Romaine/Cos | 70–80 days | Better than most | Fall, winter, indoor | Good |
| Crisphead/Iceberg | 70–80 days | Poor | Cool spring only | Poor |
Choosing your PVC pipe setup: vertical vs horizontal, and what materials you actually need
There are two main configurations: horizontal pipes stacked in a rack or wall-mounted frame, and vertical pipes standing upright. Each has real trade-offs, and the right choice depends on your space, budget, and how hands-on you want to be.
Horizontal pipe systems
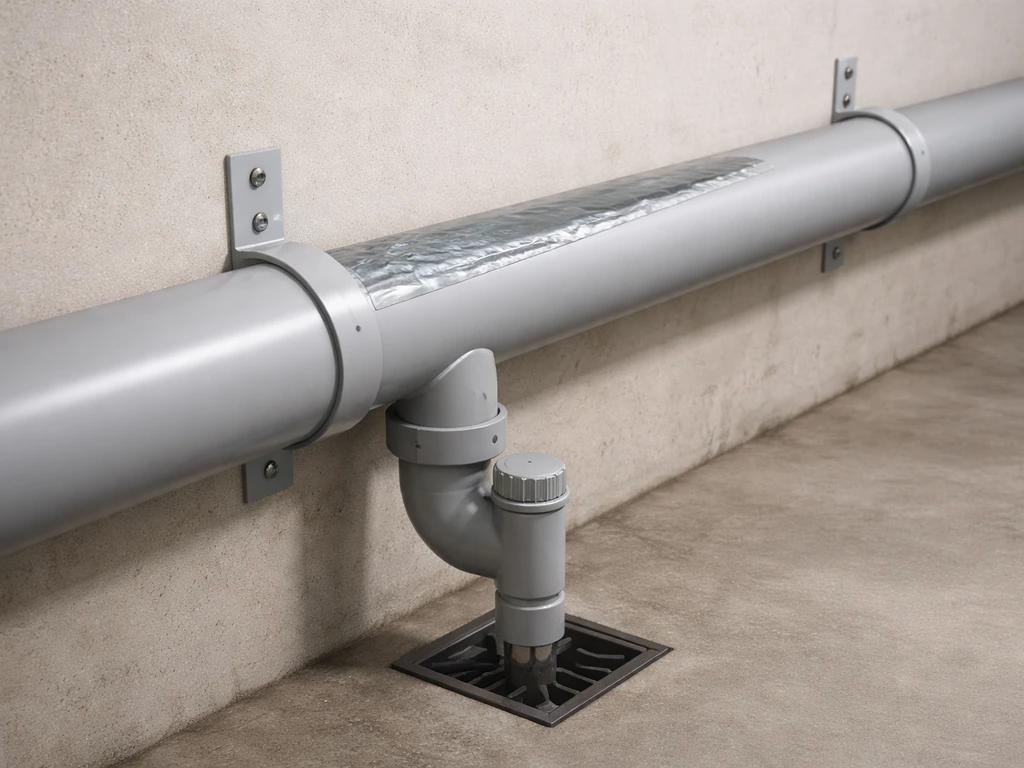
Horizontal setups are closer to a classic NFT channel system. You run 3-inch or 4-inch PVC pipes at a slight downward angle (about 1 to 2 percent slope, or roughly 1 inch of drop per 5 feet of pipe) so nutrient solution flows from the high end to a collection drain at the low end, then back to a reservoir. Plants sit in 2-inch net pots dropped into holes cut along the top of the pipe. This layout gives every plant very similar access to water and nutrients, which means more even growth across the system. It is my preferred approach for serious harvests.
Vertical pipe systems
Vertical systems use a standing pipe with staggered holes or pockets cut into the sides. A pump pushes water or nutrient solution up to the top, and gravity pulls it down past each plant site and back into a reservoir at the base. The big advantage is footprint: a single 5-foot vertical pipe can hold 10 to 15 lettuce plants in a floor space of less than 1 square foot. The downside is that plants at the top and bottom can get uneven moisture, so checking for dry spots at the bottom of the pipe is something you'll need to stay on top of.
Pipe diameter and material
Use 3-inch or 4-inch diameter Schedule 40 PVC for horizontal setups. For vertical towers, 4-inch pipe gives you enough room to fit 2-inch net pots snugly without the roots getting cramped. Avoid flexible vinyl tubing for the main growing channels as it collapses under weight. Standard white Schedule 40 PVC is widely available, food-safe for this use, and blocks light well enough to prevent algae growth inside the pipe when the holes are covered by plant crowns. If you're filling pipes with a soil-less mix instead of running hydroponic solution, you can also use capped PVC sections with drainage holes drilled at the base, essentially turning each pipe into a trough planter.
Reservoir and pump basics
For a hydroponic system, you need a reservoir (a dark-colored or covered storage bin works well, 5 to 10 gallons per 10 to 15 plant sites), a small submersible pump, and tubing to deliver solution to the top of each pipe. The return line or drain at the low end of horizontal pipes feeds solution back to the reservoir by gravity. Before planting anything, assemble the whole system, run plain water through it, and check every joint and drain point. Leaks and clogged emitters are much easier to fix before you have plants in the way.
Preparing the pipe system: holes, spacing, growing media, and drainage
Cutting holes and spacing
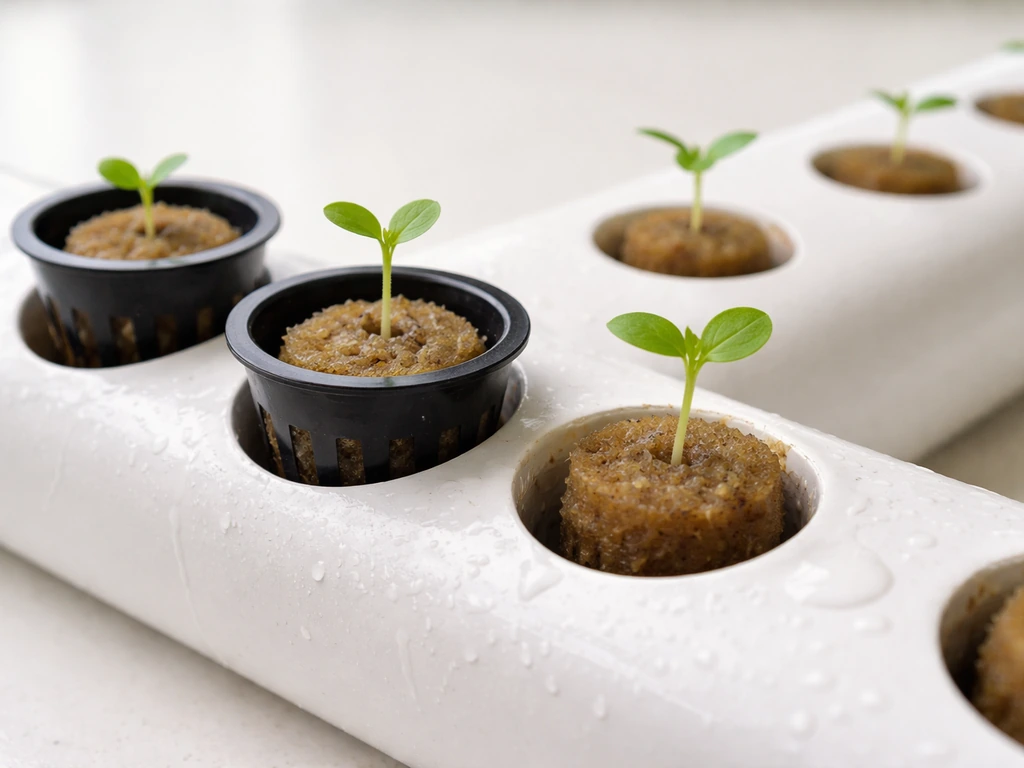
For loose-leaf lettuce, space holes at least 6 inches apart center-to-center. For butterhead types, go 8 inches apart. This matches up with MSU Extension's thinning guidance of at least 4 inches between leaf lettuces and 6 inches for bibb/butterhead types, and in a pipe system you want a little extra room because the pipe walls constrain root spread. Use a hole saw sized to your net pots: a 1.75-inch hole saw for 2-inch net pots is a snug, secure fit. For vertical towers, stagger holes in a spiral pattern around the pipe so plants on adjacent rows don't shade each other.
Growing media options
If you're running a hydroponic setup, fill net pots with an inert media like hydroton (expanded clay pebbles), perlite, or a 50/50 mix of perlite and vermiculite. These anchor the plant, allow roots to hang down into the nutrient film, and dry out quickly enough between cycles to keep oxygen reaching the roots. If you want a simpler soil-less drip approach, fill the pipe sections with a peat-perlite or coco coir mix and water from the top. Cornell's research confirms that screened, sterilized media like vermiculite or perlite-based mixes significantly reduce damping-off risk compared to unsterilized soil, which is worth keeping in mind for seedlings.
Drainage setup
Every pipe needs a clear drainage path. For horizontal NFT channels, cap the high end and leave the low end open to drain into a collection trough or directly back into the reservoir. For vertical towers, the reservoir sits at the base and acts as the drain catch. For soil-filled pipes, drill several 0.25-inch drainage holes along the bottom of the pipe to prevent waterlogging. Test drainage before planting: pour a liter of water into the system and confirm it moves through and exits cleanly without pooling.
Starting seeds and planting for fast, even germination
Lettuce seeds germinate best at soil temperatures around 60 to 65°F. Above 80°F, germination rate drops sharply and some varieties go thermally dormant. If your growing space is warm, start seeds somewhere cooler, like a basement shelf or even in the refrigerator for 24 hours before sowing, which can break temperature-induced dormancy.
I strongly recommend starting seeds in small rockwool cubes or peat pellets rather than sowing directly into net pots. Sow 2 to 3 seeds per cube, keep them moist but not soaked, and expect germination in 3 to 5 days at the right temperature. Once you see the first true leaves (about 10 to 14 days after germination), thin to the strongest seedling per cube and transplant the whole cube into a net pot. This gives you a much more predictable transplant than trying to sow and thin directly in the pipe system.
If you want to direct-sow into soil-filled pipes, press seeds just below the surface (about 0. USU Extension cautions that damping-off risk increases when seedlings are kept very wet, so aim for controlled moisture and prevent contamination between trays or benches keep the media consistently moist until germination. 125 inch deep) and keep the media consistently moist until germination. Thin to one plant per hole once seedlings are an inch tall. Watch for damping-off: brown, water-soaked lesions at the stem base that cause seedlings to topple are the telltale signs. If you see it, improve airflow immediately and let the top of the media dry slightly between waterings.
Light, temperature, and daily care
Outdoor and natural light
Lettuce grows best when average daily temperatures sit between 60 and 70°F. Outdoors, a south or east-facing placement with 6 or more hours of direct sunlight works well. In warmer months, partial afternoon shade actually helps slow bolting. If your pipe system is on a balcony or patio, consider positioning it to catch morning sun and miss the hottest afternoon rays once temperatures start climbing.
Indoor grow lights
Indoors, aim for a PPFD of about 150 to 250 µmol/m²/s at the plant canopy and run lights for 14 to 16 hours per day. This lands you in the daily light integral (DLI) range of roughly 14 to 20 mol/m²/day that lettuce needs for steady, compact growth indoors. Full-spectrum LED grow lights hung 12 to 18 inches above the canopy are the most practical option for a pipe system. If plants start stretching toward the light or leaves look pale and thin, move the light closer. If leaf edges are bleaching or curling, raise it a few inches.
Watering and circulation schedules
For a hydroponic NFT system, run the pump continuously or on a timer set to run for 15 minutes every 30 to 60 minutes during the day. At night, you can reduce frequency, but don't let roots dry out completely. For a drip or top-fed soil-less setup, water when the top inch of media feels dry, which in a warm indoor space usually means once or twice a day. Overwatering is the most common beginner mistake and the fastest way to trigger root rot. When in doubt, check root health by pulling a net pot and looking at the roots: white and firm is healthy, brown and slimy means too much water and not enough oxygen.
Hydroponic vs soil-less approach: nutrients and water management
This is the decision that shapes everything else in your setup, so it's worth thinking through clearly before you start drilling holes.
Hydroponic (nutrient solution) approach
In a fully hydroponic PVC pipe system, plain water circulates through the pipes and you supply all nutrients via a dissolved nutrient solution in the reservoir. This is faster and more controllable than soil. Target pH of 5.8 to 6.2 for optimal nutrient uptake, with an electrical conductivity (EC) of about 0.8 to 1.0 mS/cm for seedlings and 1.2 to 1.6 mS/cm for mature plants. Nitrogen should be in the range of 75 to 100 ppm. Check pH and EC every day or two with an inexpensive meter and adjust as needed. If pH drifts above 6.5, nutrient lockout starts to show up as yellowing leaves, and if EC climbs too high the plants will look wilted even with plenty of solution available.
Change out the reservoir solution completely every 1 to 2 weeks to prevent nutrient imbalances and salt buildup. Top off with plain water between changes to compensate for evaporation. Monitor dissolved oxygen especially in warm conditions: solution above 68°F carries less oxygen, which stresses roots. A simple aquarium air stone in the reservoir helps significantly.
Soil-less drip approach
If full hydroponics feels like a lot to manage right now, a soil-less drip setup is a reasonable middle ground. Fill your pipe holes or troughs with a coco coir and perlite mix (roughly 70/30), and water with a diluted liquid fertilizer solution at every second or third watering. A balanced liquid fertilizer at half the label strength works well for lettuce. This approach is more forgiving of beginner mistakes because the media buffers pH and moisture swings. The tradeoff is slightly slower growth compared to a dialed-in NFT system and a higher risk of pests and fungal problems in organic media. If you've grown lettuce in cups or plastic bottles before, this method will feel familiar. If you want a more detailed, step-by-step cup method, you can also follow this guide on how to grow lettuce in a cup.
| Factor | Hydroponic NFT | Soil-less Drip (Coco/Perlite) |
|---|---|---|
| Setup complexity | Higher (pump, reservoir, pH meter needed) | Lower (drip timer or hand watering) |
| Growth speed | Faster (45–55 days typical) | Slightly slower |
| Nutrient control | Precise (EC + pH monitoring) | More forgiving |
| Algae/clog risk | Higher without light exclusion | Lower |
| Best for | Committed growers, multiple pipes | Beginners, small setups |
Harvesting, keeping plants going, and fixing what goes wrong
When and how to harvest
For loose-leaf varieties, start harvesting outer leaves once plants are 4 to 6 inches tall, which usually happens 30 to 40 days after transplanting. Cut or snap individual outer leaves and the plant keeps producing from the center. For a fuller cut-and-come-again harvest, cut the whole plant about 1 inch above the base (the growth point), leave the stub in the net pot, and it will regrow. You can typically get 2 to 3 full cuts from a single plant before growth slows. For butterhead types, harvest the whole head at once when it feels firm and full.
To keep your system producing continuously, stagger your plantings every 2 to 3 weeks and consider rotating through variety types by season: loose-leaf for spring and indoor growing, Batavian or butterhead types through late spring, and romaine for fall and winter. This succession approach, combined with replacing harvested plants promptly, is how you turn a small PVC system into a near-constant supply of fresh greens.
Bolting
If plants shoot up a tall central stalk and leaves turn bitter, they're bolting. This happens when temperatures push above 75°F and day length increases. Once a plant bolts, that stem won't recover: pull it and replace it. To prevent bolting, choose slow-bolting varieties, keep temperatures below 75°F, provide afternoon shade outdoors, and shorten your light period indoors to no more than 16 hours. If you're hitting summer and everything keeps bolting, consider switching entirely to a fall planting after temperatures drop.
Root rot
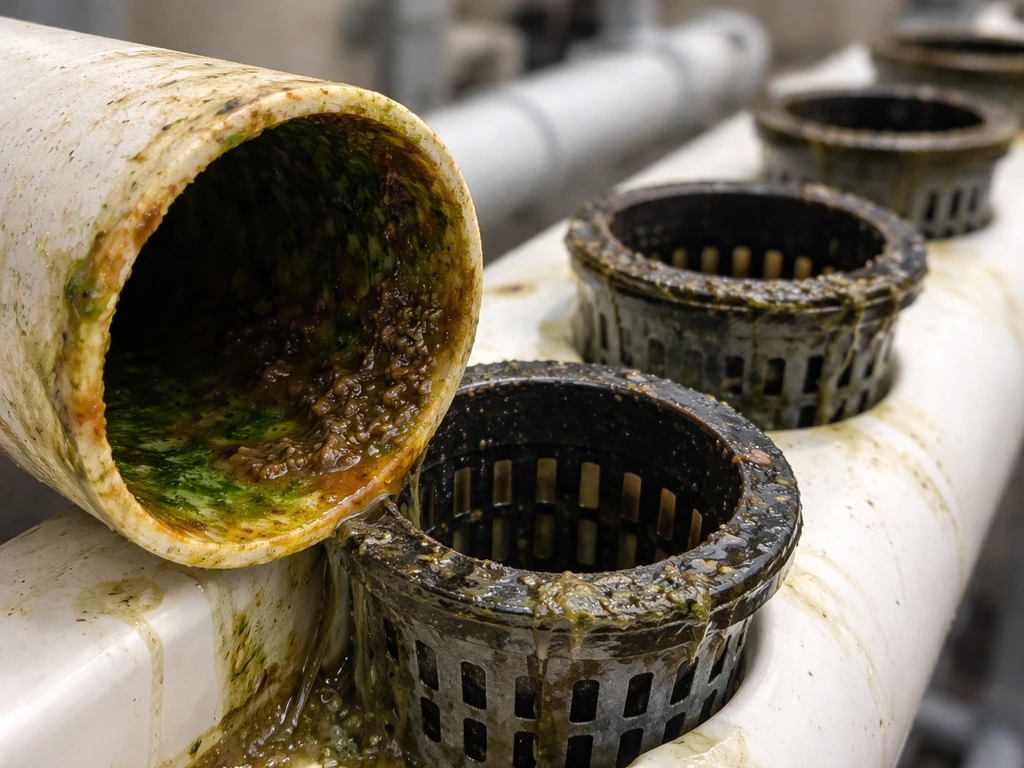
Brown, slimy roots and wilting despite plenty of moisture are the signs of root rot, usually caused by Pythium or similar water molds. This happens when the root zone stays waterlogged and oxygen-deprived. Fix it by reducing pump run time, adding an air stone to your reservoir, checking that drainage isn't blocked, and if you have a soil-less fill, make sure it isn't compacted. Remove affected plants and sanitize the pipe before replanting.
Algae and biofilm
Green or brown slime inside pipes and on net pots is algae or biofilm growing wherever light and nutrient solution meet. White PVC helps, but net pot holes left uncovered between plant crowns let light in. Cover exposed holes with black tape, foam collars around plant stems, or small pieces of opaque material. Clean the reservoir and pipes with a diluted hydrogen peroxide solution (3 ml of 3% H2O2 per liter of water) during each reservoir change.
Clogged holes or emitters
Blocked drip emitters or clogged drainage holes are a common frustration. Roots can grow into drain points and mineral deposits build up in emitter tips. Check emitters and drain holes weekly: a toothpick or thin wire clears most mineral clogs. If debris keeps getting into your lines, add a small inline filter between the pump and the supply tubing. Flush the whole system with plain water every time you change the nutrient solution.
Uneven growth across pipes
If plants in one section of your system look consistently smaller or yellower than others, check flow rate and slope first. In a horizontal system, even a slightly uneven pipe angle causes solution to pool at one end and flow too fast at the other. Use a spirit level when setting up and adjust shims under pipe supports until the slope is consistent. In a vertical tower, plants near the top often get more moisture than those at the bottom: if lower plants look dry, slow down the drainage or increase pump run time.
Nutrient deficiencies (hydroponic systems)
Yellowing of older lower leaves usually points to nitrogen deficiency: increase your EC slightly toward the upper end of the 1.2 to 1.6 range and confirm your pH is between 5.8 and 6.2. Tip burn (brown, crispy leaf edges) is very common in indoor lettuce and is caused by poor calcium uptake driven by low airflow around the plant canopy, not by calcium deficiency in the solution. Adding a small fan to improve air circulation around the plants reduces tip burn significantly. Pale new growth across the whole plant suggests iron or manganese lockout, almost always because pH has drifted above 6.5.
Quick troubleshooting checklist
- Seeds not germinating: check media temperature (target 60–65°F), reduce watering frequency, and try pre-chilling seeds for 24 hours
- Seedlings falling over at the base: damping-off, improve airflow and let media surface dry between waterings
- Wilting despite wet media: root rot, check drainage and oxygenation of the root zone
- Plants bolting: temperature above 75°F or day length too long, switch to heat-tolerant variety or adjust timing
- Bitter leaves: approaching bolt or post-bolt, harvest immediately and replant
- Algae in pipes: cover all exposed holes and clean reservoir with diluted hydrogen peroxide
- Clogged emitters: flush system weekly, install inline filter, clear with toothpick
- Uneven growth: check slope and flow rate across horizontal pipes, check moisture distribution in vertical towers
- Yellow lower leaves: nitrogen deficiency, increase EC and verify pH is 5.8–6.2
- Crispy brown leaf edges (tip burn): increase airflow with a small fan pointed at the canopy
Growing lettuce in PVC pipes rewards the growers who pay attention to a few simple numbers: temperature, pH, EC, and light hours. Get those in range, choose a loose-leaf variety, and keep the drainage clear, and you'll have more salad greens than you know what to do with in under two months. If you're exploring other space-saving container approaches alongside your pipe system, similar principles apply to growing lettuce in hanging baskets or plastic bottles, though the watering dynamics differ enough to be worth reading about separately. If you want a balcony-friendly option, use the same basics of choosing the right lettuce variety, keeping consistent moisture, and ensuring good drainage, but adapted for a hanging basket growing lettuce in hanging baskets. To learn the specific steps and timing, see our guide on how to grow lettuce in plastic bottles.
FAQ
Can I grow lettuce in PVC pipes without net pots?
Yes, but you still need a way to hold the plant crown above the water flow. Options include using a foam collar with a hole for the stem or a plug insert that fits snugly in the pipe hole. The key is keeping the crown above the solution so it doesn’t rot, while still letting roots hang freely into the film or drip zone.
What size hole should I cut if my plants are smaller than typical net pots?
If you cut holes to match the net pot size, you avoid root crowding and excess gaps. For smaller starts, either use smaller net pots or use a temporary insert to prevent the plug from sliding too deep. Loose seals cause uneven moisture because solution can bypass some roots.
How do I prevent algae if light hits the PVC or the solution?
Even with white PVC, algae thrives when light reaches nutrient solution or exposed media. Cover any uncovered holes, keep the reservoir in darkness, and minimize any times the system is run without plant crowns covering openings. Also, avoid letting splash or mist land back into the channels.
Is it better to run the pump continuously or in cycles for NFT lettuce in PVC pipes?
For lettuce in NFT, short cycles are often more forgiving than constant flow, but the right balance depends on room temperature and how well the roots stay wet without becoming waterlogged. A practical approach is the daytime cycling method, then check roots after a full night. If roots look dry or pale, increase run time or frequency before making other changes.
Why do my seedlings fail even though adult plants seem fine?
Most seedling problems come from temperature swings, damping off, or planting too deep. Keep germination in the cooler 60 to 65°F range, thin early if more than one seed germinates, and transplant the whole starter plug at the right depth so the crown sits above the media. Also confirm drainage works before you fill with media, because clogged drains hit seedlings first.
What should I do if the water flow looks uneven across the pipe?
First verify slope with a level, then check that the high end cap and low end drain are positioned correctly. Uneven flow can also happen if some holes are cutting too much material and changing internal water paths. After adjusting, run plain water for 30 minutes and inspect the wetting pattern before replanting.
How often should I refill water or nutrient solution between reservoir changes?
Top off based on evaporation rather than a fixed schedule. If you use full hydroponics, keep measuring pH and EC, because topping off with plain water changes dilution. If EC keeps climbing, you are not draining and refreshing often enough, or solution is concentrating at the return points due to low flow.
Can I reuse the same PVC media for multiple lettuce cycles?
You generally should not reuse inert hydroponic media without cleaning and disinfection. For perlite and vermiculite or coco-based mixes, salt buildup and biofilms accumulate and increase fungal risk. If you do reuse, you must thoroughly rinse and sterilize, and expect performance to drop compared with starting fresh.
What is the safest way to handle and adjust pH and EC at home?
Adjust in small increments, after checking that the meter is calibrated or at least within a reasonable reading range. Make one change at a time, then recheck after the solution is fully mixed for several minutes. Never chase big pH swings daily, because lettuce responds more to stable ranges than to rapid corrections.
Do I need airflow or fans for tip burn in PVC pipe lettuce?
Yes. Tip burn is strongly linked to low airflow around the canopy and uneven transpiration, not just nutrient concentration. A small oscillating fan that moves air across the plants helps, especially indoors where humidity can be high and stagnant air collects near leaf tips.
How do I know if the problem is root rot versus nutrient imbalance?
Root rot usually shows brown, slimy roots and wilting even when the system is running correctly, plus it often comes with persistent slimy biofilm. Nutrient imbalance more often causes leaf color changes across multiple plants without slimy root collapse. If you suspect root issues, pull one plant and inspect roots immediately, then fix water and oxygen before adjusting fertilizer.
How do I troubleshoot a system that keeps clogging drains or emitters?
Start by clearing the clogs weekly with a thin wire or toothpick, then add an inline filter if debris keeps getting into the line. Also ensure you are using properly sized media in net pots or inserts, because fine particles can wash into emitters. When you change solution, flush with plain water to remove mineral buildup.
Can I grow different lettuce types in the same PVC pipe system?
You can, but keep variety differences in mind. Loose-leaf and butterhead can work together, because their spacing and harvest style are similar, but romaine and slower-maturing types can crowd space or create uneven harvest timing. If you mix, consider staggering planting dates per variety so spacing requirements and light needs stay compatible.