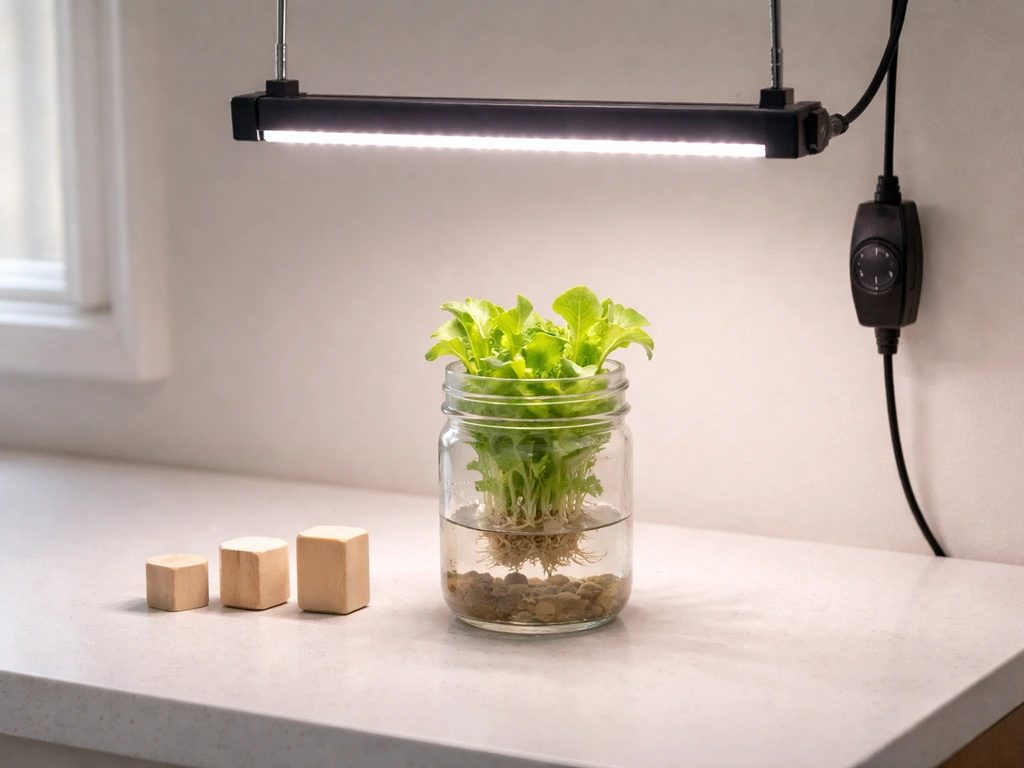
You can absolutely grow lettuce in a mason jar, and it works best as a hydroponic Kratky setup using a wide-mouth quart jar (32 oz), a 2-inch net cup, and a nutrient solution instead of soil. The jar sits filled partway with diluted liquid fertilizer, the net cup holds the seedling and some growing medium, and the roots dangle down into the solution.
How to Grow Lettuce in a Mason Jar: Step-by-Step Guide
Marcus Holloway
4 Jun 2026
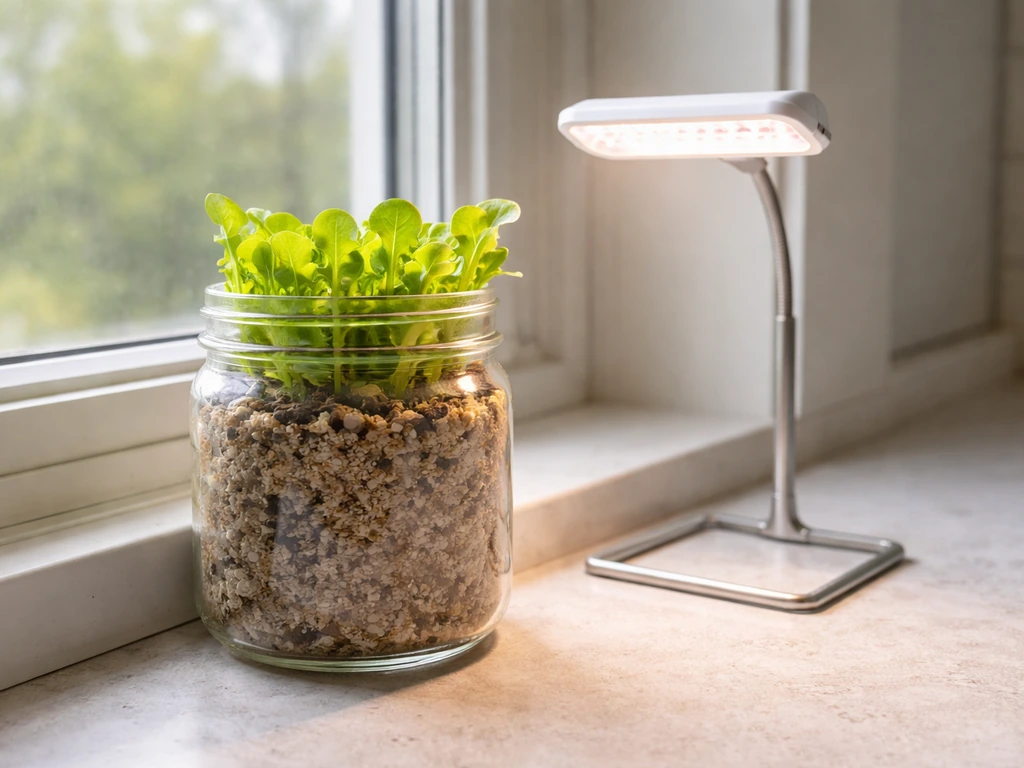
Set it under a grow light for 14–16 hours a day, keep temperatures under 75°F, and you'll be cutting leaves in 3–4 weeks. It's one of the most beginner-friendly ways to grow lettuce indoors, and the setup costs almost nothing if you already have a mason jar. A hanging basket setup can use the same loose-leaf approach so you get ongoing harvests how to grow lettuce in a hanging basket.
What you'll need before you start

The gear list is short and inexpensive. The most important call you'll make is wide-mouth vs regular-mouth jar. Go wide-mouth every time. A standard wide-mouth quart mason jar (32 oz) fits a 2-inch net cup almost perfectly, and that snug fit is important because it keeps the cup stable and limits light from reaching the nutrient solution below (light encourages algae).
- Wide-mouth quart (32 oz) mason jar, clear glass is fine but wrapping it in black tape or a paper sleeve helps block algae-promoting light
- 2-inch net cup (plastic basket pot, available online for pennies each)
- Growing medium for the net cup: hydroton (clay pebbles), perlite, or a small plug of rockwool all work well; avoid potting soil as it will cloud the water and clog roots
- Lettuce seeds suited to small containers (more on variety selection below)
- Hydroponic nutrient solution, either a pre-mixed liquid like General Hydroponics Flora Series or a simple all-purpose like MaxiGro; you're targeting roughly 75–100 ppm nitrogen in the reservoir
- A pH meter or pH test strips; lettuce likes a solution pH between 5.5 and 6.5
- A grow light if natural window light is insufficient (more on this below)
- A marker and tape to label your jar with the variety and start date
One optional but useful addition: a piece of black electrical tape or black craft paper wrapped around the lower two-thirds of the jar. This blocks light from the nutrient solution and dramatically reduces algae buildup on the jar walls and roots. It takes 30 seconds and makes a noticeable difference over a grow cycle.
Choosing the right lettuce variety for jar growing
Not every lettuce variety is equally happy in a small jar. You want loose-leaf types that you can harvest progressively (cut-and-come-again) rather than full-head types like iceberg that need months and a lot more root space. In a quart jar, head lettuce just isn't practical. Loose-leaf and butterhead varieties are the sweet spot.
- Black Seeded Simpson: fast, vigorous loose-leaf, one of the most reliable for indoor jar growing
- Oak Leaf (red or green): compact, tender, excellent flavor, handles lower light better than many varieties
- Buttercrunch: a compact butterhead that works reasonably well in a single jar if you harvest the outer leaves rather than waiting for a full head
- Little Gem: a miniature romaine that germinates at 45–75°F and works in a jar if harvested young; a good pick if you want slightly more structure than a loose-leaf
- Mesclun mixes: sow a pinch of mixed leaf types in one jar for a variety of flavors and textures from a single container
For seed starting in a jar, you have two options. The most common approach is to sow seeds directly into the moistened growing medium inside the net cup, then lower the net cup into the jar once seeds germinate. The second option is to start seeds in a small rockwool cube or a peat plug, let them sprout, then transfer the seedling and plug into the net cup and fill in around it with clay pebbles. Both work. Direct sowing saves a step. Starting in a rockwool plug gives you a head start and lets you pick the strongest seedling to move into the jar.
Preparing the jar and getting airflow right
The biggest mistake beginners make with mason jar lettuce is not thinking about the air gap. In the Kratky method, the roots that sit above the nutrient solution need to be exposed to air, not submerged. As the plant drinks the solution down, an air gap naturally forms between the bottom of the net cup and the surface of the water. Those aerial roots absorb oxygen, and the submerged roots absorb water and nutrients. Without that air gap, roots suffocate and rot. Airflow around the net cup is genuinely critical for root health.
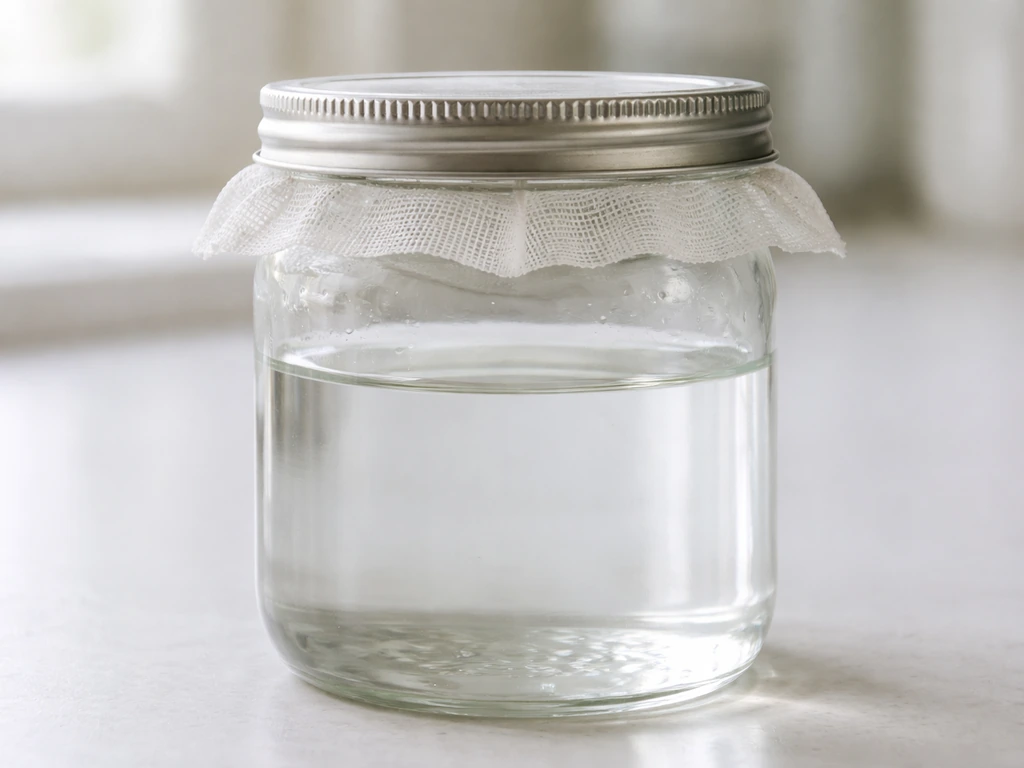
- Wash your jar with hot soapy water and rinse it thoroughly. Any soap residue can affect plant health.
- Wrap the lower portion of the jar in black tape or paper to block light from the reservoir.
- Fill the jar with pH-adjusted nutrient solution (pH 5.5–6.5) until the bottom of the net cup just barely touches or is no more than 1/4 inch below the solution surface. This matters most at the very start when roots haven't grown down yet.
- Place dry clay pebbles or perlite in the net cup about halfway, add your seedling or seed, then fill the rest of the net cup around it with more medium.
- Do NOT seal the jar with a lid. The net cup sits in the jar mouth and the space around it provides the airflow the roots need. If the net cup fits very snugly, leave a small gap or use a lid with a hole cut in it to hold the cup while still allowing air movement.
- As the plant grows and drinks the solution down, resist topping up to the original level. Let the air gap grow. Top up only when the gap exceeds 2–3 inches, and when you do, add fresh nutrient solution.
If you want to use a soil-based approach instead (simpler but less clean), you can fill the jar with a mix of potting soil and perlite (roughly 70/30), leave 2 inches of headspace, sow seeds on the surface, and water carefully from above. This works but drainage is the challenge. A standard mason jar has no drainage holes. To compensate, add a 1-inch layer of coarse gravel or perlite at the bottom before the soil, and never pour water until you see runoff. The hydroponic Kratky method is honestly easier to manage than soil in a sealed jar because you can see the solution level through the glass.
Light and temperature: the two things that make or break it
How much light lettuce actually needs
Lettuce grown indoors needs 14–16 hours of light per day at an intensity of around 150–200 µmol/m²/s (PPFD) at canopy level. That translates to a daily light integral (DLI) of roughly 10–15 mol/m²/day. The honest truth is that most windowsills cannot hit those numbers reliably, especially in winter or in north-facing windows. A south-facing window in summer might come close, but if your jar sits on a windowsill and the plants start stretching tall and thin within the first week, that's your sign the light is too low.
A modest LED grow light (even a budget T5 or small panel light) positioned 6–12 inches above the jar and running on a timer for 16 hours on / 8 hours off will outperform most window setups. This is the single upgrade that makes the biggest difference for indoor jar lettuce. Photoperiod genuinely matters: studies show that changing from 12 hours to 16 hours of light can measurably affect how fast lettuce grows. Aim for at least 14 hours and you'll be in good shape.
Temperature: keep it cool
Lettuce is a cool-season crop and it behaves like one indoors. The ideal range for growing (not just germinating) is 60–70°F. Once temperatures consistently exceed 75°F, bolting risk increases sharply, and you'll also see faster spoilage of any moisture sitting in the jar. Lettuce seeds will germinate anywhere from 40–80°F (with optimum around 65°F), but the seedlings grow best when kept cool. If your grow light generates a lot of heat close to the jar, raise it or add a small fan nearby. A fan also helps with the airflow issue mentioned earlier. Keep the jar away from radiators, south-facing windows in July, and any spot that gets warm afternoon sun.
Watering, nutrition, and keeping things healthy in the jar
Watering in the Kratky method
The Kratky method is passive hydroponics: you fill the reservoir once, let the plant drink it down, and only top up when the air gap gets too large (more than 2–3 inches). You're not pumping, you're not misting, you're just watching the level. Lettuce prefers to stay evenly moist rather than going through wet-dry cycles, and the Kratky setup handles this naturally. When you do top up, always use fresh nutrient solution at the right pH, not plain water. Plain water repeatedly added to the reservoir dilutes your nutrients and eventually starves the plant.
If you chose the soil method, water when the top half-inch of the medium is dry. Lift the jar to gauge weight. Don't pour until you feel it getting noticeably lighter. Overwatering in a jar with no drainage holes is the fastest way to kill your lettuce. Saturated soil drives out oxygen, causes roots to rot, and can trigger the mold issues covered in the troubleshooting section. Water in the morning if possible.
Nutrition: what to feed and when
For the hydroponic setup, use a balanced hydroponic nutrient solution mixed to the manufacturer's instructions at roughly half strength to start, aiming for around 75–100 ppm nitrogen. A Purdue hydroponic lettuce production document recommends nutrient solutions with nitrogen concentrations around 75, 100 ppm and notes that recycling-solution management is critical during weeks 3, 4 nitrogen concentration around 75–100 ppm. Lettuce is a light feeder and it's easy to over-fertilize in a small jar. Weeks 3 and 4 are when nutrient management matters most because the plant is growing fast and drinking more. Check your solution level and pH every few days at this stage.
For a soil-based jar setup, start fertilizing between 2 and 6 weeks after planting, depending on whether your potting mix already contains fertilizer. Many commercial mixes contain a starter charge that lasts 4–6 weeks. After that, use a diluted liquid fertilizer with a roughly 3-1-2 N-P-K ratio (such as a product labeled for vegetables or leafy greens) every 1–2 weeks. A balanced 10-10-10 formula diluted to half strength also works. Avoid over-fertilizing: too much nitrogen in a hot, moist jar environment pushes lush growth that's more susceptible to mold and pest damage.
How to sow, thin, and harvest your jar lettuce
Sowing the seeds
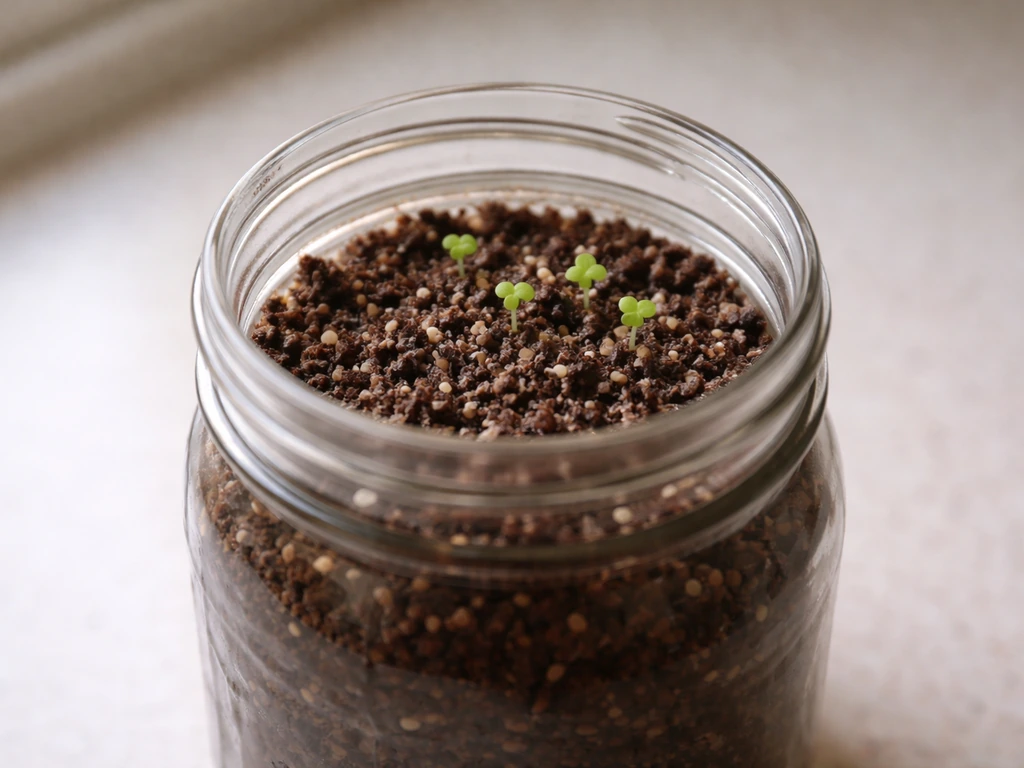
Whether you're going hydroponic or soil-based, lettuce seeds need to be sown very shallow. Cover them no more than 1/8 inch deep, or simply press them onto the surface of moist medium and pat lightly. The Agriculture Handbook guidance is clear: no more than one-eighth of an inch, and water alone can assist germination. For the Kratky net cup, moisten the clay pebbles or perlite thoroughly, place 2–3 seeds near the center, barely cover, and keep the whole cup misted or wrapped loosely in plastic wrap for the first 2–3 days while seeds sprout. Remove the covering once you see the first green. Germination typically happens in 2–7 days at 60–70°F.
Thinning to one plant per jar
If you planted 2–3 seeds per net cup or jar and all of them germinate (which is common with fresh seed), you need to thin down to one plant per container once seedlings have their first true leaves. Don't pull the extras out by the root because that disturbs the keeper plant. Snip the unwanted seedlings at the base with scissors. One plant per quart jar is the right spacing. Crowding two plants into one jar means both end up stunted, and you get less total harvest than if you'd just kept one strong plant.
Harvesting: cut-and-come-again vs starting over
For loose-leaf varieties, use the cut-and-come-again method. Once leaves are 3–4 inches tall (usually 3–4 weeks from sowing), harvest the outer leaves first and leave the central growing point (crown) completely untouched. Cut leaves about 1–1.5 inches above the crown where the stem meets the growing medium. The plant will regrow from the center and give you multiple harvests from the same jar. Never cut into or below the crown or the plant stops growing. You can typically get 2–4 harvests from one planting before the plant bolts or the flavor turns bitter.
If you prefer a one-and-done approach, let the plant grow to full size (5–6 weeks for most loose-leaf types) and cut the entire plant about 1.5 inches above the growing medium. Some plants will regrow even from a full cut if the crown is intact, but it's less reliable than progressive outer-leaf harvesting. For butterhead types like Buttercrunch, harvest outer leaves over time and then take the whole head once it forms a soft center. Trying to grow a full iceberg-style head in a quart jar is not worth the effort: stick with loose-leaf or baby butterhead.
Troubleshooting: when things go wrong
| Problem | Likely cause | What to do |
|---|---|---|
| Mold or white fuzz on the growing medium or jar walls | Poor airflow, excess moisture, or too-warm temps | Improve airflow around the jar, water in the morning only, remove affected material, and ensure temps stay under 75°F |
| Leggy seedlings stretching toward the light | Insufficient light or too few hours | Move light closer (aim for 6–12 inches above the jar) or extend photoperiod to 16 hours |
| Seeds not germinating after 10+ days | Too cold, too deep, or seeds too old | Ensure temp is 60–70°F, verify seeds are barely covered (1/8 inch max), and test seed viability with fresh seed |
| Yellowing leaves on older growth | Nitrogen deficiency or overwatering/root rot | For hydro: check pH and refresh nutrient solution. For soil: check drainage and feed with diluted liquid fertilizer |
| Algae (green slime) in the jar reservoir | Light reaching the nutrient solution | Wrap the lower jar in black tape or paper immediately; algae compete for nutrients and oxygen |
| Wilting despite adequate moisture | Root rot from saturated conditions | For soil jars: let medium dry slightly, improve drainage layer. For hydro: check that air gap exists above solution |
| Bitter flavor or plant bolting (sending up a flower stalk) | Temperatures above 75°F or plant getting too old | Harvest immediately when you see a stalk starting. Move jar to a cooler spot. Start a new jar with a bolt-resistant variety |
| Fungus gnats or small insects on the medium | Moist organic material at the surface | Let the surface dry more between waterings, use yellow sticky traps near the jar, and switch to an inorganic medium like perlite |
Mold and leggy growth are by far the most common issues beginners run into with jar lettuce. Nine times out of ten, leggy growth is a light problem and mold is an airflow or overwatering problem. Fix those two things first before assuming the seeds or variety are bad.
Week-by-week timeline so you know what to expect
| Week | What's happening | What to do |
|---|---|---|
| Week 1 (Days 1–7) | Seeds germinating, first tiny sprouts appearing by days 3–5 | Keep medium moist but not soaking, maintain 60–70°F, run light 16 hrs/day, remove plastic cover once sprouts appear |
| Week 2 (Days 7–14) | Seedlings developing first true leaves, roots starting to explore | Thin to one plant per jar by snipping extras. Check nutrient solution level in hydro setup. Begin monitoring for stretch/leggy growth |
| Week 3 (Days 14–21) | Plant visibly growing, leaves broadening, roots well established | This is peak nutrient demand for hydro setups: check pH and solution level every 2–3 days. Begin diluted fertilizer for soil jars if needed |
| Week 4 (Days 21–28) | Leaves reaching 3–4 inches on loose-leaf varieties, harvestable size | Take your first harvest of outer leaves. Cut 1–1.5 inches above the crown. Leave the center intact to regrow |
| Week 5–6 | Regrowth after first harvest, second flush of leaves forming | Harvest outer leaves again as they reach size. Watch for bolting signs (upward stalk formation) especially if temps are warming |
| Week 6+ or at bolt sign | Plant slowing, flavor intensifying, possible bolt | Harvest remaining leaves, compost the plant, clean the jar, and start a fresh batch |
Realistically, you're looking at 3–4 weeks from sowing to first harvest for loose-leaf varieties. That's a fast turnaround for any indoor growing project, which is part of why lettuce in a jar is such a satisfying beginner experiment. Most people are surprised by how quickly it works when the light and temperature are right.
How mason jar growing compares to other small-container methods
A mason jar is one of several compact container options for growing lettuce indoors. It's arguably the most elegant and accessible because mason jars are cheap, widely available, easy to clean, and perfectly sized for a single lettuce plant. Growing lettuce in a cup follows the same basic principles but with less reservoir volume, which means more frequent top-ups for hydroponic setups.
Plastic bottles can work well for Kratky-style growing and have the advantage of being easy to cut and customize, though they're less stable on a countertop. Hanging baskets and PVC pipe systems take more setup but allow you to grow more plants at once in a small footprint. To grow lettuce in a hanging basket, you’ll want the right basket size, fast-draining potting mix, and consistent moisture so the roots do not dry out hanging baskets.
For someone starting with one or two plants and minimal gear, the mason jar method is the simplest and most forgiving entry point. If you want a more scalable setup than a mason jar, you can also use the same cool-season, loose-leaf approach in a PVC pipe system as described in how to grow lettuce in pvc pipes.
Your next steps right now
- Grab a wide-mouth quart mason jar and a pack of 2-inch net cups (both available at hardware stores or online for under $5 total).
- Pick a loose-leaf variety: Black Seeded Simpson or Oak Leaf are the easiest starting points.
- Mix your nutrient solution, pH it to 5.5–6.5, and fill the jar to just below the net cup's bottom.
- Add moist clay pebbles or perlite to the net cup, sow 2–3 seeds no deeper than 1/8 inch, and set the cup in the jar.
- Wrap the bottom of the jar in black tape or paper to block light from the reservoir.
- Position a grow light 6–12 inches above the jar and set it to 16 hours on / 8 hours off using a cheap outlet timer.
- Check the jar every 2–3 days: look at the solution level, check for mold or algae, and watch for leggy growth.
- Thin to one plant at week 2, start harvesting outer leaves at week 3–4, and enjoy fresh greens from your countertop.
FAQ
How do I know when to top up the nutrient solution in my mason jar lettuce setup?
Aim for an air gap of about 2–3 inches before you top up. If the roots are staying submerged, the net cup may be sitting too low or the solution level was filled too high at the start, so adjust the starting fill and do smaller top-ups rather than waiting too long.
Can I just add plain water to the jar between top-ups?
If you add plain water, you dilute the nutrients and can also change pH over time. When topping up, use freshly mixed nutrient solution to the same target strength, then recheck pH, because small daily additions can still push your solution out of range.
What pH range should I keep for jar lettuce, and what should I do if pH drifts?
Use a pH test kit or meter, because lettuce is sensitive to nutrient availability. If pH is off and you keep seeing pale or yellowing leaves, drain and remix the reservoir rather than repeatedly adding nutrients, since salt buildup in a small jar compounds the problem.
Should I stir or refresh the solution regularly in a mason jar (or only top up)?
Kratky works best when the reservoir is untouched until the air gap grows. Topping up too frequently, or fully refilling, tends to reduce oxygen exposure to roots, which increases rot and algae, so wait until the air gap is clearly larger than your target before adding.
My seeds germinated poorly. What are the most common reasons in a mason jar?
For direct-sown seeds, germination is faster when the medium is consistently moist but not waterlogged, then keep the jar loosely covered for the first couple of days to prevent drying. If they never sprout, the most common causes are too deep sowing, dry medium, or too-warm temperatures.
Can I keep plastic wrap on the jar longer to boost humidity?
Yes, but only for short periods early on, when seeds are sprouting. Once seedlings have their first true leaves, keep humidity moderate and focus on stable airflow, because prolonged high humidity inside a jar encourages mold on both the medium and the jar walls.
How can I tell if my jar lettuce is getting enough light through a window?
If your jar is on a windowsill, rotate it every 2–3 days so growth stays even. However, if you see stretching within the first week, it usually means the light intensity is too low, and a grow light placed 6–12 inches above will fix it faster than rotating.
What do common leaf problems like yellowing or brown tips mean in mason jar lettuce?
Brown tips and crispy leaf edges often point to heat or irregular moisture, while yellowing can indicate nutrient dilution or imbalance. In a jar, start by correcting temperature and solution strength, then trim affected leaves, since older tissue usually will not recover.
When I harvest, how do I avoid damaging the crown so the plant keeps regrowing?
Loose-leaf harvests should leave the crown untouched, and cuts should be high enough not to nick the growing point. If the crown is damaged, regrowth slows or stops, so use scissors and aim for a consistent cut just above where the stem meets the growing medium.
How long should one mason jar planting keep producing before I start a new batch?
If you want to harvest repeatedly, check how you manage temperature and airflow rather than replanting. Most quart-jar plants do best with continued outer-leaf harvesting until flavor turns bitter or bolting starts, then you can start a new jar so you do not lose all your lettuce at once.
What should I do first if I see mold on the jar walls or leaves?
Mold that shows up as fuzzy growth is usually a sign of too much moisture, low airflow, or excessive light reaching the reservoir. Improve airflow and block light from the solution, then reduce overwatering and remove any badly affected leaves so the plant can recover.
Can I grow iceberg lettuce in a mason jar if I change the nutrients or light schedule?
Iceberg-style heads generally fail in a quart mason jar because the root system needs much more volume and time. If you want a head-forming result indoors, consider larger containers or grow bags, otherwise choose loose-leaf or butterhead varieties that can be harvested progressively.
Is it okay to take mason jar lettuce outside during summer, and what changes should I make?
If you plan to move the jar outdoors, harden it off gradually over several days, because indoor-grown lettuce can sunburn quickly. Also, outdoor airflow helps, but heat still matters, so keep it shaded during warm afternoons to reduce bolting risk.