You can absolutely grow lettuce in a cup, and it works better than most people expect. Fill a cup or small container (at least 4–6 inches deep) with a good potting mix, poke drainage holes in the bottom, sow a pinch of leaf lettuce seeds about 1/8 inch deep, set it somewhere that gets 6 or more hours of light, keep the soil consistently moist, and you'll have baby greens ready to snip in about 3–4 weeks. That's the whole system. Everything below just makes it work better and keeps it producing longer.
How to Grow Lettuce in a Cup: Step-by-Step Guide
Marcus Holloway
2 Jul 2026
Best cup and soil setup for growing lettuce
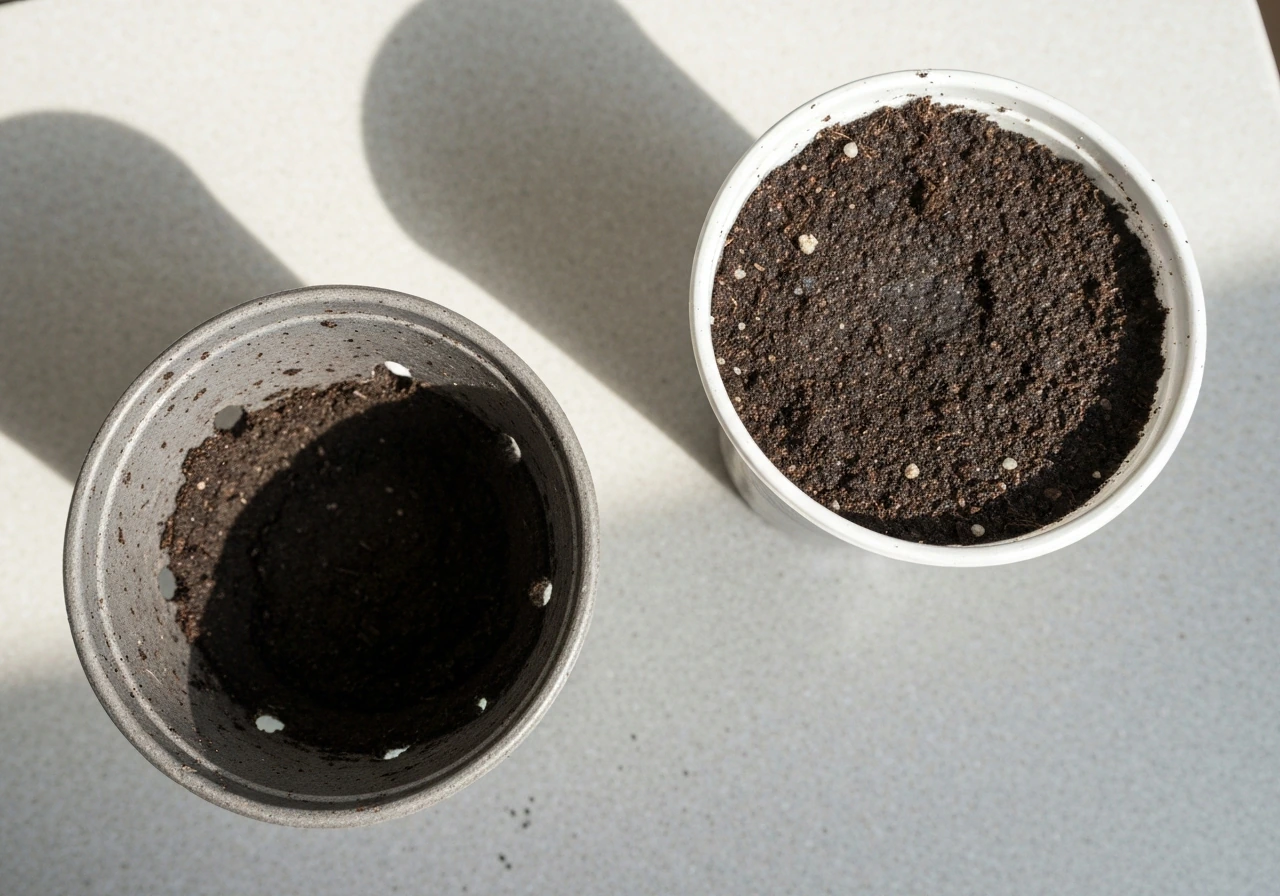
The cup itself matters more than most beginners realize. The two non-negotiables are size and drainage. Lettuce roots are surprisingly shallow, but they still need room to breathe, and they'll rot fast if they sit in standing water. A container that's at least 4 inches deep and 4–6 inches wide gives a small planting of leaf lettuce plenty of room. A 16 oz or 32 oz plastic cup works fine. So does a repurposed yogurt container, a small nursery pot, or a coffee mug, as long as you deal with drainage.
If your cup has no drainage hole, make one. Seriously, just poke or drill 3–5 holes in the bottom. A skewer, a nail, or a drill bit all work. Overwatering combined with no drainage is the fastest way to kill lettuce in a small container. The limited volume of soil in a cup has nowhere to offload excess water, so roots go soggy and rot sets in quickly. Set the cup on a small saucer to catch drips and you're set.
Use a standard potting mix designed for containers, not garden soil dug from outside. Garden soil compacts hard in pots and doesn't drain well. A bagged potting mix stays loose and airy, which lettuce roots love. If you want better moisture retention, a seed-starting mix works great too since the finer texture helps those tiny seeds make good contact with the medium and germinate evenly. Most potting mixes include enough slow-release fertilizer to feed seedlings for at least 6 weeks, so there's no need to fertilize right away. Just fill the cup to within about half an inch of the top, water it lightly to settle the mix, and you're ready to plant.
- Container depth: 4 inches minimum, 6 inches ideal
- Container width: 4–6 inches for a small planting, larger if you want more
- Drainage holes: required, at least 3–5 holes in the bottom
- Material: food-safe plastic, ceramic, or glazed pottery all work fine
- Soil: bagged potting mix or seed-starting mix, not outdoor garden soil
- Fill to about 1/2 inch from the rim to make watering easier
Lettuce varieties that actually thrive in small cups
Not all lettuce is cup-friendly. Head lettuce like iceberg or romaine grows large and takes months, so skip those for this kind of setup. What you want are loose-leaf varieties bred for quick, compact growth. These produce tender, cut-and-come-again leaves that are perfect for a small container and a kitchen windowsill harvest.
My top picks for cup growing are 'Tom Thumb' (a tiny butterhead that stays compact), 'Black Seeded Simpson' (a fast-growing loose-leaf that tolerates a bit of heat), 'Oakleaf' (beautiful flavor, heat-tolerant), 'Little Gem' (compact romaine-style), and any seed blend labeled 'Mesclun' or 'Salad Mix.' Mesclun mixes are especially great for cups because they combine several varieties with different textures and colors, and they're designed for repeated cutting. Buttercrunch also works well in a cup if you give it a slightly larger container. For something more decorative, 'Lollo Rossa' and 'Red Sails' both have frilly red leaves that look great on a windowsill while also tasting excellent.
Avoid varieties labeled 'full-size,' 'crisphead,' or those with a long days-to-maturity number (anything over 55–60 days). In a small cup, you want fast, forgiving growers. If you're curious about pushing container growing further, some of the same compact varieties work well in other creative setups like plastic bottles, mason jars, or PVC pipe gardens, though a cup is the simplest starting point. If you want to skip cups entirely, you can use the same compact-variety approach to learn how to grow lettuce in plastic bottles.
How to plant lettuce in a cup (seeds vs. starter plants)
Starting from seed (the easy, cheap route)
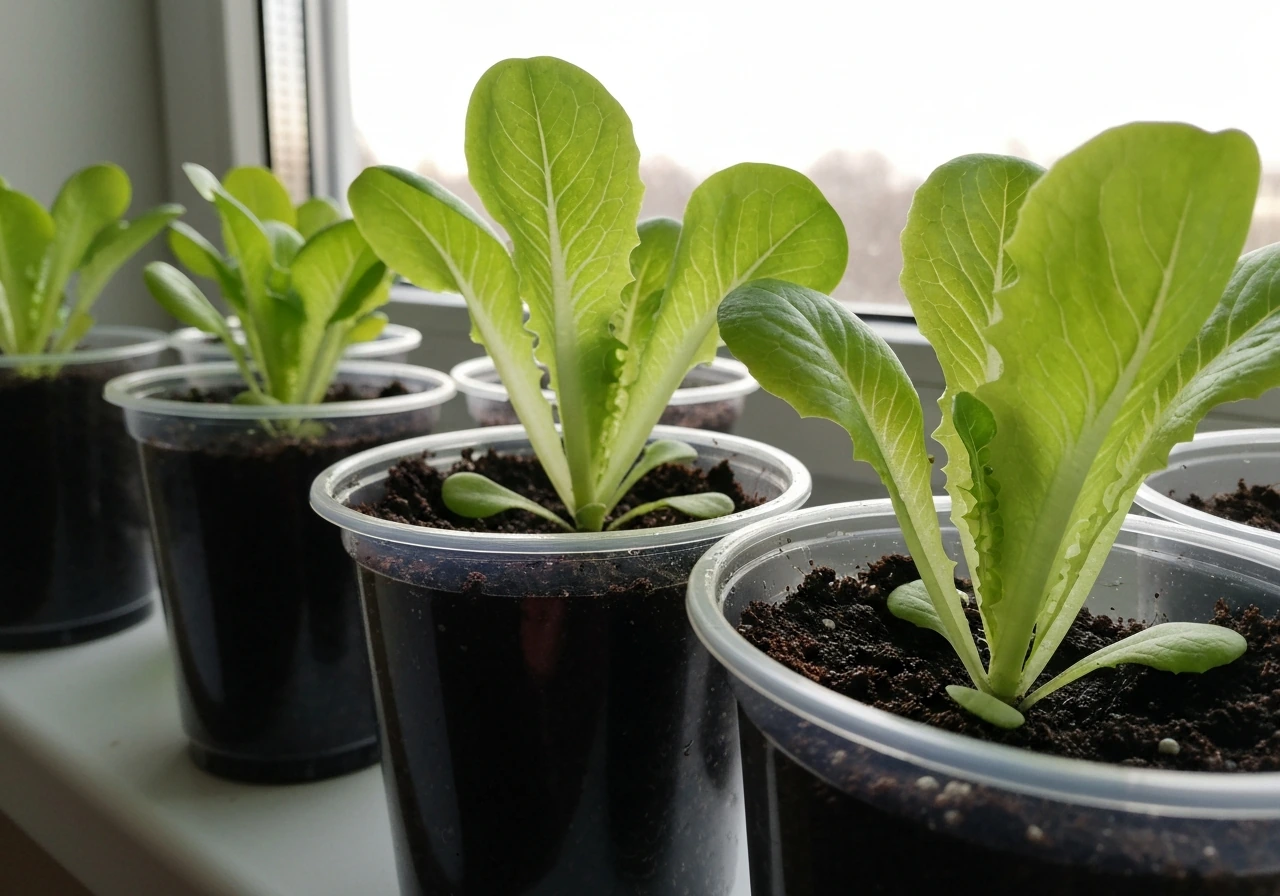
Seeds are the way to go for cup growing. They're cheap, they sprout fast in the right conditions, and you don't have to worry about transplant shock. Lettuce seeds are tiny, so a pinch between your fingers drops roughly 10–20 seeds into a small cup. That's fine. You'll thin them later. Scatter the seeds across the surface of your moistened potting mix and press them down lightly with your fingertip so they make good contact with the soil. Then cover with just a thin dusting of potting mix, blank" rel="noopener noreferrer">about 1/8 to 1/4 inch deep. Lettuce needs a little light to germinate, so don't bury them deep.
Mist the surface with a spray bottle and cover the cup loosely with plastic wrap or a plastic bag to hold in moisture during germination. You don't need bottom heat, but lettuce germinates best between 60–70°F (15–21°C). Expect to see tiny sprouts poking through in 5–10 days. Once you see green, remove the plastic covering and move the cup into your brightest light spot.
Using a starter plant
If you pick up a lettuce starter from a garden center or grocery store, transplanting into a cup is straightforward. Gently loosen the root ball, set it in your cup with fresh potting mix around it, and water it in well. The downside is that most starter plants are sold in clusters of seedlings that need to be separated, which can stress the roots a bit. Seeds in a cup are honestly just as easy and give you more flexibility. That said, a starter plant gets you to harvest faster if you're impatient.
Light, temperature, and watering for fast, healthy lettuce
Light requirements
Light is where most indoor lettuce attempts fail. Lettuce needs at least 6 hours of bright, direct or indirect light per day. A south-facing or west-facing window is your best bet. If you only have a north-facing window or your space is dim, you'll need a grow light. Even a basic 20W LED grow light positioned 4–6 inches above the seedlings and run for 14–16 hours a day will produce much better results than a weak windowsill. The telltale sign of insufficient light is leggy, pale seedlings that flop over. If that's happening, get more light on them immediately.
Temperature
Lettuce is a cool-season crop. It grows best between 60–70°F (15–21°C) and slows down or bolts (goes to seed) when temperatures climb above 75–80°F. This actually makes it ideal for indoor growing in an air-conditioned or naturally cool space, like a kitchen or basement. Avoid placing your cup near a heat vent, on top of an appliance that radiates warmth, or on a windowsill where afternoon sun raises the temperature significantly. If you're growing through summer, a slightly shaded east-facing window is better than a blazing south-facing one during July and August.
Watering
The goal with watering is consistently moist, never soggy. Because your cup holds such a small volume of soil, it dries out faster than a large container. Check it daily by pressing a finger about an inch into the soil. If it feels dry, water it. If it still feels moist, leave it. When you water, pour slowly until water runs freely from the drainage holes, then stop. Don't let the cup sit in standing water in its saucer for more than 30 minutes. A spray bottle works well during germination and for baby seedlings, but once plants get a few inches tall, switch to a gentle pour from a small watering can.
Thinning and caring for seedlings as they grow
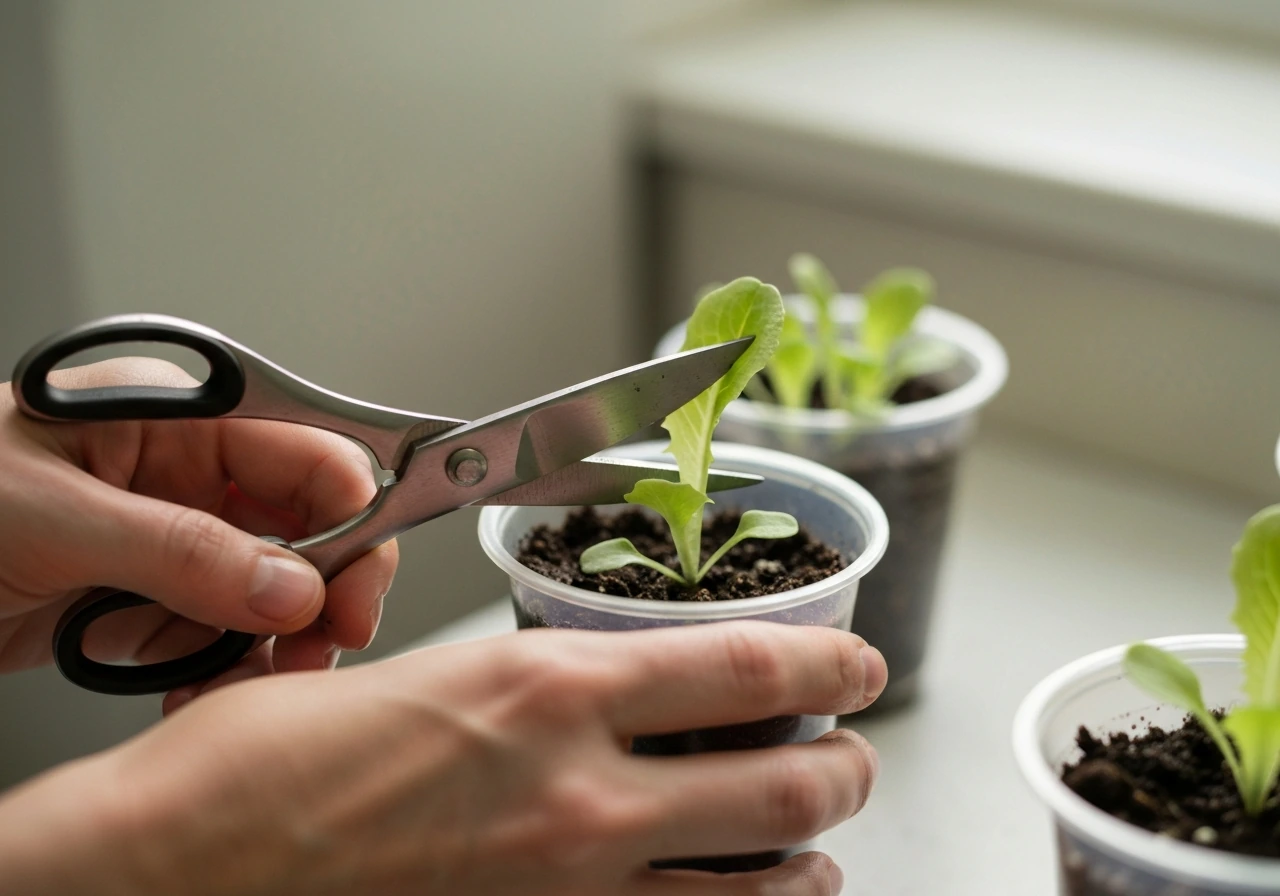
Once your seedlings are about an inch tall, it's time to thin them. I know it feels wasteful to pull out seedlings you just grew, but overcrowded lettuce gets leggy, competes for nutrients, and is far more prone to disease. For a 4–6 inch cup, thin down to 2–3 healthy seedlings spaced a couple of inches apart. For a wider container, you can keep more. Use scissors to snip the unwanted seedlings at the soil line rather than pulling them out, which can disturb the roots of the plants you're keeping.
After thinning, growth accelerates noticeably. Keep rotating the cup a quarter turn every few days so all sides get even light exposure. This prevents the plants from leaning dramatically toward the window. You don't need to fertilize during this phase if you used a standard potting mix, but if the leaves start looking pale yellow after 4–5 weeks, a half-strength liquid balanced fertilizer once a week will perk them back up.
Watch for any seedlings that are clearly weaker than the others. Remove them so the stronger plants don't have to compete. At this stage, the goal is 2–3 vigorous plants in the cup rather than a crowd of struggling ones.
When and how to harvest for continuous production
Baby leaf lettuce is ready to harvest when the leaves are 3–4 inches tall, which usually happens 3–4 weeks after germination for loose-leaf varieties. You don't have to wait for the plant to reach full maturity. In a cup, baby greens are your best strategy anyway.
To harvest using the cut-and-come-again method, use clean scissors to snip the outer leaves about 1–2 inches above the soil line, leaving the inner growth tip and any small inner leaves intact. Cut-and-come-again harvesting involves cutting salad greens about 1 inch above the potting mix so the plants regrow for additional harvests cut salad greens about 1 inch above the potting mix so plants regrow. That central growing point is what sends up new growth. If you cut too low (right at soil level), you risk damaging the growing tip and the plant may not recover. Take no more than one-third of the plant's leaves at a single harvest. The plant will regrow and you can harvest again in 1–2 weeks. A single cup can realistically give you 3–5 harvests before the plants get too mature, start bolting, or lose quality.
Once the plants start sending up a tall central stalk (that's bolting), the remaining leaves will taste bitter and tough. At that point, pull the plants out, refresh the potting mix or just fluff and top off the existing mix, and replant a new round of seeds. Staggering two or three cups planted 2 weeks apart keeps you in continuous lettuce without any gaps.
Troubleshooting common problems
Leggy, floppy seedlings
This is almost always a light problem. If your seedlings are tall, thin, and leaning heavily toward the window, they're not getting enough light. Move the cup to a brighter location or add a grow light. If you've already got leggy seedlings, gently bury the stems a bit deeper when you thin and transplant, and get more light on them immediately. They may recover, but the sooner you fix the light issue, the better.
Poor or no germination
If nothing sprouted after 10–14 days, the most common culprits are old or poor-quality seeds, soil that dried out during the germination window, seeds buried too deep, or temperatures that were too cold or too warm. Try again with fresh seeds, keep the surface consistently moist (the plastic wrap tent trick helps a lot), and make sure the room temperature is between 60–70°F.
Bitter leaves and bolting
Bitter, tough leaves usually mean the plant is stressed by heat or has started bolting. Once you see the plant sending up a tall central flower stalk, the leaves turn bitter fast and there's not much you can do to reverse it. Harvest what's still edible, pull the plant, and start fresh. To prevent it, keep temperatures cool (below 75°F), avoid direct hot afternoon sun in summer, and harvest frequently so the plant doesn't mature too fast.
Soggy soil and wilting despite watering
If the soil looks wet but plants are wilting or turning yellow, you likely have a root rot situation from overwatering or inadequate drainage. Check that the drainage holes aren't clogged. Let the cup dry out more between waterings. If the roots look brown and mushy when you check, the plant is probably too far gone. Start over with fresh mix and better drainage habits. If you want a different setup, learning how to grow lettuce in PVC pipes can give you better control over drainage and harvesting.
Slow growth or pale yellow leaves
Slow growth is usually a light or temperature issue. Pale yellow leaves after a month or so often indicate the potting mix has run low on nutrients. A half-strength liquid fertilizer (something balanced like a 10-10-10 or a dedicated liquid vegetable fertilizer) applied once a week will usually green things back up within a week.
Pests and disease near windows
Indoor lettuce is mostly pest-free, but fungus gnats are the most common nuisance. They're attracted to consistently wet soil. Let the top inch of soil dry out a bit between waterings, and sticky yellow traps near the cup catch adult gnats quickly. Aphids occasionally show up on windowsill plants. A quick spray of diluted neem oil or just knocking them off with a stream of water under the faucet usually handles them. Good airflow around the plant (a small fan nearby or an open window) prevents the damp, stagnant conditions that invite mold and disease.
Quick-reference timeline for cup-grown lettuce
| Stage | Timeframe | What to do |
|---|---|---|
| Germination | 5–10 days after sowing | Keep surface moist, cover with plastic, wait for sprouts |
| Seedling emergence | Days 7–14 | Remove plastic cover, move to bright light, begin daily checks |
| Thinning | When seedlings reach 1 inch tall | Snip extras with scissors, keep 2–3 plants per small cup |
| First harvest (baby leaves) | 3–4 weeks after germination | Cut outer leaves 1–2 inches above soil with scissors |
| Follow-up harvests | Every 1–2 weeks | Repeat cut-and-come-again, take no more than one-third at a time |
| End of productive life | 6–8 weeks after germination | Pull plants when bolting begins, refresh soil, replant |
How to keep the harvests coming (repeat planting strategy)
The best way to always have fresh lettuce on hand is to run two or three cups in rotation, starting a new one every 2 weeks. By the time your first cup is finishing its productive cycle, the second one is hitting peak baby-leaf stage and the third is just germinating. It takes up almost no space and means you're never waiting 4 weeks after starting over from scratch. This staggered approach works just as well in hanging baskets, plastic bottles, mason jars, or larger containers if you ever want to scale up, but a few cups on a windowsill is honestly one of the easiest and lowest-commitment ways to grow food indoors year-round. If you want to grow lettuce in a hanging basket, use a shallow container with drainage and keep the soil evenly moist for best results hanging baskets.
FAQ
What size cup is the minimum if I only have a small container (like an 8 oz disposable cup)?
If it is truly under about 4 inches deep, expect slower growth and more frequent watering, and the risk of root rot rises. For the best odds, stick to at least 4 to 6 inches deep and 4 to 6 inches wide, and use multiple drainage holes. If you must go smaller, plant only 1 seedling after thinning and harvest baby leaves sooner (smaller cuts, more frequent).
How many seeds should I sow in a cup to avoid wasting seedlings after thinning?
Sow slightly more than you plan to keep, then thin to your target. A practical approach is to scatter 10 to 20 seeds in a cup, then thin to 2 to 3 strong plants at about 1 inch tall. This accounts for low germination and weak seedlings, and it reduces the chance you end up with too few plants.
Can I reuse the potting mix from the previous lettuce batch?
It is usually better to refresh it because the mix can compact, lose structure, and get depleted of nutrients over 4 to 6 weeks. If you reuse, fluff it well, top off with fresh potting mix, and inspect drainage. If you notice persistent gnats or a sour smell from overwatering, discard the mix and start fresh to reduce disease risk.
Should I fertilize my cup lettuce if the leaves look pale or slow?
Wait until at least 4 to 5 weeks before fertilizing if you used a standard container mix. If leaves turn pale yellow after that window, switch to a half-strength liquid balanced fertilizer once a week. Avoid heavy feeding early, since seedlings in small containers can burn more easily and can promote soft, disease-prone growth.
Why are my lettuce seedlings dying even though the soil looks moist?
Most of the time it is either standing water or poor drainage. Check that water actually runs freely from the bottom holes and that the cup is not staying in the saucer with wet drips for long. Also confirm you are not burying seeds too deep, because compacted or overly covered seeds can rot before sprouting.
What is the best way to water during the germination and early seedling stage?
During germination, mist the surface gently and keep it consistently moist, not soaked. After sprouts appear, switch to a careful pour only until you see water drain out, then stop. If the mix stays wet for days, reduce watering frequency and ensure the top inch is drying slightly between waterings.
How do I harvest repeatedly without killing the plant?
Use clean scissors and cut only the outer leaves, leaving the inner growth point intact. Remove no more than about one third of the foliage at a time per harvest. If regrowth slows, do one more cut once new outer leaves form, but if you see a tall central stalk, harvest what is still tender and replant for better flavor.
My lettuce tastes bitter, even though it looks healthy. What should I check?
Bitter flavor usually comes from heat stress or bolting, even before plants look obviously “done.” Keep temperatures under about 75°F, avoid hot afternoon sun, and harvest sooner when leaves are 3 to 4 inches tall. If you see the central stalk starting, plan to start a fresh batch rather than trying to salvage the flavor.
How can I prevent fungus gnats in a cup of lettuce?
Let the top inch of soil dry slightly between waterings, since gnats thrive in constantly wet media. Use sticky yellow traps near the cup to catch adults, and avoid overwatering during the first few weeks. If you keep seeing larvae, consider letting the surface dry a bit more and top-dressing lightly with dry potting mix to reduce the moist habitat.
Can I grow lettuce in a cup outdoors, and what changes would I make?
Yes, outdoors works well in cool weather, but you still need drainage and consistent moisture. Use partial shade during warm periods, since container soil heats faster than ground. If afternoon temperatures climb, switch to earlier morning sun or a more shaded spot, and harvest baby leaves more frequently to avoid bitterness.