Yes, you can grow romaine lettuce in water, and it actually works surprisingly well for both quick regrowth from store-bought scraps and a longer-term indoor setup using a simple hydroponic-style container. The simplest version takes about five minutes to set up: cut the base off a romaine head, set it in a shallow dish with about an inch of water, place it near a sunny window, and you will see new leaves and roots within a few days. If you want more than a handful of fresh leaves and are aiming for a proper head you can harvest repeatedly, a basic Kratky-style container with nutrient solution gets you there with only a little more effort.
How to Grow Romaine in Water: Step-by-Step Guide
Marcus Holloway
26 Apr 2026
What growing romaine in water actually means
People use the phrase "grow in water" to mean two pretty different things, and it is worth knowing which one you are actually doing before you get started. The first is simple water regrowth, where you take the cut bottom of a romaine head (what most people throw away) and rest it in a shallow dish of water. This is not true growing in the sense of producing a full, mature head from scratch. What you get is a second flush of leaves from the existing stored energy in the base. It is fast, free, and genuinely useful for extra salad greens, but it has limits. The plant will eventually run out of steam without nutrients.
The second meaning is water culture or passive hydroponics, where the plant's roots are suspended in or above a reservoir of water mixed with nutrients. The Kratky method is the most popular version of this for home growers. It is non-circulating (no pump needed), you mix up a nutrient solution once, fill a container, and let the roots do the work as the solution slowly depletes. This approach can take romaine from seedling to a full harvestable head and can be repeated indefinitely. If your goal is a reliable supply of fresh romaine grown entirely in water, this is the method to use.
Choosing your setup: simple dish vs. hydroponic container
The right setup depends on what you want to get out of this. Here is an honest comparison of both options so you can decide quickly.
| Feature | Shallow Dish / Jar (Regrowth) | Kratky-Style Container (Hydroponics) |
|---|---|---|
| Starting material | Store-bought romaine base/cutting | Seeds or seedlings |
| Cost to start | Near zero (use any bowl) | Low ($5–$20 for container, net cups, nutrients) |
| Setup time | Under 5 minutes | 30–60 minutes |
| Yield | A few extra leaves per cutting | Full harvestable heads, repeatedly |
| Nutrients needed | Not initially (uses stored energy) | Yes, hydroponic nutrient mix required |
| Ongoing effort | Change water every 1–2 days | Refresh solution every 1–2 weeks |
| Best for | Quick experiment, reduce food waste | Consistent indoor lettuce supply |
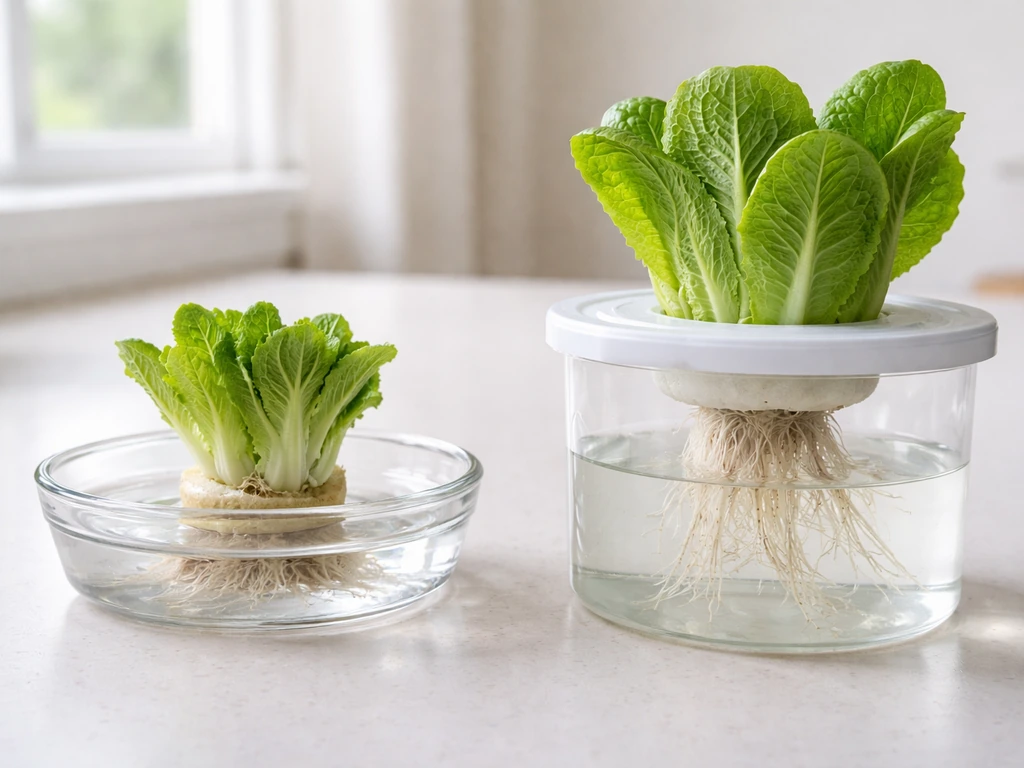
For the dish method, any bowl, jar, or shallow container works. Fill it with about an inch of water, just enough to touch the cut base without submerging the whole thing. For a Kratky setup, you want an opaque container (a dark-colored plastic tote or even a mason jar wrapped in foil works) with a lid that holds net cups. The opacity matters because light hitting nutrient solution encourages algae growth, which you do not want. A 1-gallon container comfortably supports one to two romaine plants. If you want to grow four or more at a time, step up to a 5-gallon tote.
Starting your romaine: store-bought scraps vs. seeds or cuttings
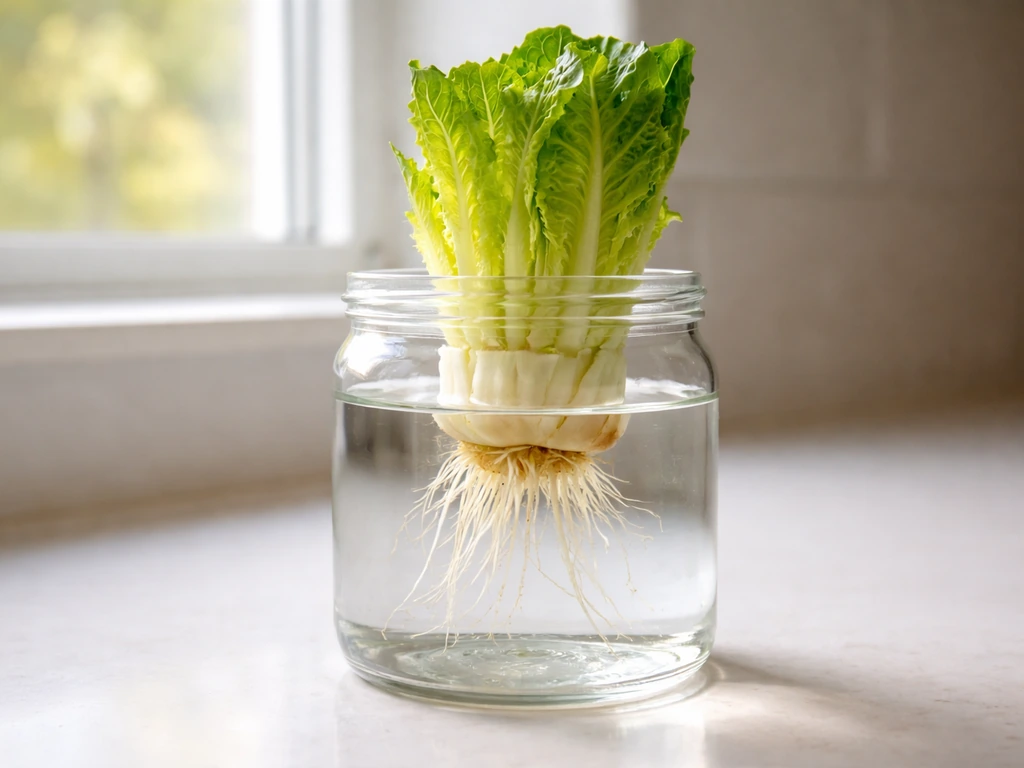
The store-bought regrowth method
This is the easiest entry point and a great way to see immediate results. Buy a whole romaine head (or use one you already have), and cut off the bottom 2 to 3 inches. You want a clean cut that leaves the base intact with some of the inner leaves still attached. Place the base cut-side down in your dish with about an inch of fresh water. That is it for setup. Roots typically start appearing within 2 to 3 days, and you will see fresh leaf growth coming from the center within a week. Once you see roots and new green leaves emerging, you can either keep it in water (refreshing regularly) or transfer it to a Kratky setup with nutrients to keep it going longer.
Starting from seed in a hydroponic setup
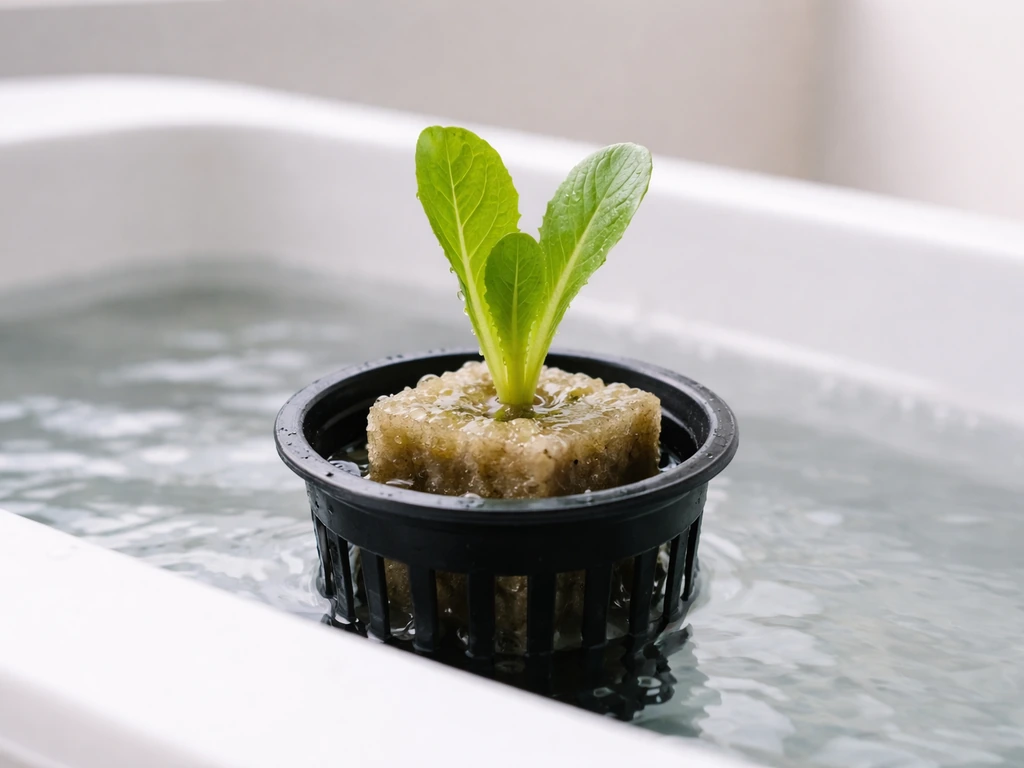
If you want to grow full heads of romaine in water rather than just regrowing scraps, start from seed. Use a rockwool cube or a small piece of a growing medium like hydroton (clay pebbles) placed in a net cup. Soak the rockwool cube in water (pH adjusted to around 5.5–6.5 if possible) before planting. Press one or two romaine seeds into the cube, about a quarter inch deep. Keep the cube moist (not soaking) while seeds germinate, which usually takes 3 to 7 days at room temperature. Once the seedling has its first true leaves (usually at 1 to 2 weeks), it is ready to move into your Kratky container. At that point, lower the net cup so the bottom just touches the nutrient solution, and the roots will do the rest.
Mini romaine varieties are particularly well-suited to water culture setups because their compact size means faster development and better spacing in smaller containers. If you are working with a limited space, like a windowsill or a small kitchen shelf, choosing a compact variety will serve you better than trying to grow a full-size romaine head indoors.
Light, temperature, and where to put it
Romaine grown indoors in water has the same light appetite as any romaine, and this is where a lot of beginners run into trouble. A bright windowsill can work if you are in a spot that gets direct or very bright indirect sun for at least 6 hours a day. A south- or west-facing window is your best bet. If your space does not get that, and most indoor setups honestly do not, a grow light is not optional, it is necessary. A simple full-spectrum LED grow light placed 6 to 12 inches above the plant for 14 to 16 hours a day will reliably replace sunlight. I have had much better results with grow lights than with windowsill-only setups, even in a reasonably bright apartment.
Temperature matters more than most guides let on. Romaine is a cool-weather crop and genuinely prefers air temperatures between 60 and 70 degrees Fahrenheit (15 to 21 degrees Celsius). It tolerates up to about 75°F, but once you push past that consistently, the plant bolts, gets bitter, and the inner leaves stay small and tight rather than opening into a usable head. If your kitchen runs warm in summer, consider placing your water setup in a cooler room or near an air vent. The water temperature also matters for root health: aim to keep your nutrient solution between 65 and 72°F. Warm water holds less oxygen and becomes a breeding ground for root rot pathogens.
Managing your water: refreshing, oxygenation, and keeping rot away
This is the part that determines whether your setup thrives or turns into a smelly mess. The two approaches have different water management needs, so here is what each one requires.
For the shallow dish / scrap regrowth method
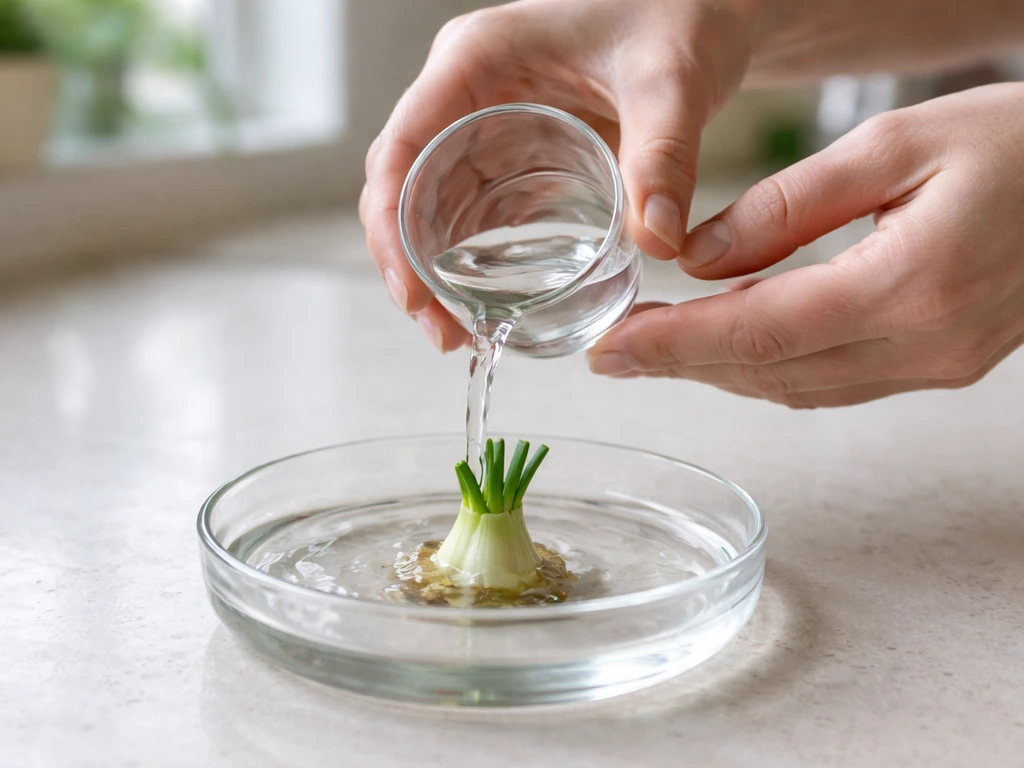
Change the water every one to two days. This is non-negotiable if you want to avoid rot and odor. Stagnant water with a plant base sitting in it will start to smell within a few days if you skip this step. Use room-temperature water, not cold water straight from the tap, and let tap water sit for 30 minutes before using it if your tap has high chlorine content. Keep only about an inch of water in the dish at a time. Submerging the cut base too deeply actually accelerates rot rather than helping the plant. If you see sliminess on the base or a foul smell, rinse the base gently and give it a full water change immediately.
For a Kratky hydroponic setup
Mix your hydroponic nutrient solution according to the package instructions and fill your reservoir so the bottom of the net cup (and thus the roots or growing medium) just makes contact with the solution. As the plant grows and the roots extend, the solution level naturally drops, and that air gap between the solution surface and the net cup bottom is actually important. It provides oxygen to the upper roots while the lower roots feed from the nutrient solution below. Do not top off the reservoir back to the original level every time you check it. Let the level drop naturally, and only top it off when the level drops significantly (more than halfway). Every one to two weeks, empty the reservoir fully and refresh with a fresh nutrient solution to prevent salt buildup and pH drift. Check pH if you can using a simple pH meter or strips, and target a range of 5.5 to 6.5 for lettuce.
Algae is a common problem in any water-based setup. It forms when light hits your nutrient solution. Keep your container opaque, cover any gaps around net cups with tape or foil, and clean the reservoir thoroughly every time you do a full nutrient change. A thin biofilm is manageable; green water with heavy algae growth competes with your plant for nutrients and oxygen and needs to be addressed immediately with a full clean and refill.
How long it takes and when to harvest
Here is what a realistic timeline looks like for each approach, starting from day one.
| Milestone | Shallow Dish Regrowth | Kratky from Seed |
|---|---|---|
| First visible new growth | 3–5 days | 3–7 days (germination) |
| Roots appear | 2–4 days | 7–14 days (roots into solution) |
| First harvestable leaves (outer) | 7–14 days | 3–4 weeks after transplant |
| Full small head possible | Not typically achievable | 5–7 weeks from seed |
| Re-harvest possible | 1–2 more cuts before plant exhausts | Harvest outer leaves repeatedly; full cut-and-come-again works well |
For the scrap regrowth method, harvest by snipping outer leaves as they grow rather than waiting for a full head. Once the growth slows significantly (usually after two to three weeks), the plant has used up its stored energy and it is time to compost the base and start with a fresh cutting. For the Kratky method, you can harvest outer leaves starting at about three weeks, which encourages the plant to keep producing from the center. For a full head harvest, cut the whole plant off about an inch above the net cup and the stump may re-grow another smaller flush of leaves. Then remove the stump, clean the net cup, and start a new seedling.
When things go wrong: common problems and how to fix them
No roots appearing after a week
If your romaine scrap is sitting in water and showing no root growth after 7 to 10 days, the most common cause is either too little light or water that is too cold. Move it to a brighter spot or directly under a grow light and make sure the water temperature is at least 60°F. Also check that the base itself is healthy. If the cut end is completely brown and mushy throughout, it is too far gone to root. Start with a fresher cutting.
Yellowing leaves
Yellow leaves on a water-grown romaine plant almost always signal a nutrient deficiency. Plain water has no nutrients, so a scrap that has been sitting in a dish for more than two weeks without nutrients will yellow as it depletes its stored reserves. If you are seeing yellowing early (within the first week), it is more likely a light problem. Move to brighter light first. If light is already good, add a very diluted hydroponic nutrient solution to your dish or transition to a proper Kratky setup.
Leggy, stretched growth
Long, pale, floppy leaves reaching in one direction mean the plant is not getting enough light. Romaine grown indoors in water is particularly prone to this because people often underestimate how much light is needed. If your leaves are growing tall and thin rather than compact and upright, add a grow light or move the container to your brightest window. Also rotate the container a quarter turn every day or two if using a window to keep growth even.
Bitter taste
Bitterness in romaine grown in water is almost always heat-related. If your indoor temperature is consistently above 75°F or the plant has been under grow lights for too many hours without a break, it will bolt (start producing flowers) and the leaves will turn bitter. Keep temperatures cool, reduce light to no more than 16 hours a day, and harvest outer leaves regularly. Once a plant has fully bolted, the bitterness does not reverse. Start fresh.
Slimy base or smelly water
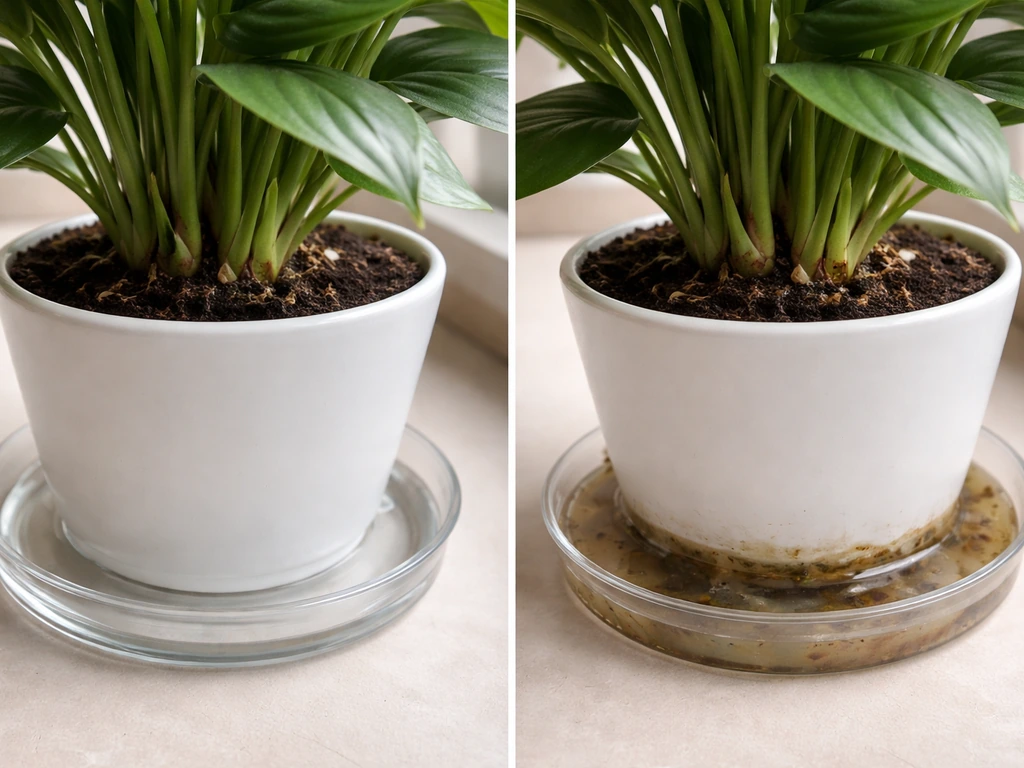
This is the most common beginner problem and it comes down to water changes. If the water smells foul or the base of the plant feels slimy, you have bacterial growth. Change the water immediately, rinse the base (and the container) gently, and commit to changing water every day or every other day going forward. In a Kratky setup, sliminess on roots (not the fine white fuzz of healthy root growth) means your reservoir needs a full clean and refill, and you should check whether light is leaking into the container and encouraging algae.
Mold on the leaves or surface
Surface mold usually means poor airflow. Indoor setups in low-airflow spaces can get a white or gray fuzzy mold on the leaves, especially on leaves touching the water surface. Remove any affected leaves immediately and improve ventilation by placing a small fan nearby or simply opening a window periodically. Avoid misting the leaves, and make sure you are not keeping the base too wet by submerging it deeper than an inch.
A few things worth knowing before you start
Growing romaine in water is genuinely one of the most approachable ways to get into indoor growing. If you are growing romaine in the Philippines, you can adapt the same water-culture steps to match local heat, light, and humidity how to grow romaine lettuce in the philippines. If you want to grow romaine outdoors where conditions can vary, here is a guide for how to grow romaine lettuce in Texas specifically. If you want step-by-step guidance, use this same indoor water setup approach as your roadmap for how to grow romaine lettuce indoors. This is also a great way to learn how to grow romaine lettuce in a cup using a small reservoir and net cup style setup step-by-step guidance. The scrap regrowth method is a great first experiment, especially if you are curious whether this kind of thing works before investing in anything more. If you find yourself wanting more than a handful of bonus leaves, the Kratky method is a natural next step and scales easily. If you want the simplest way to keep romaine growing longer than just scrap regrowth, use the Kratky method and follow the nutrient and light tips in the next steps. You can run multiple containers on a shelf with a single grow light and have a rolling supply of fresh romaine with very little ongoing maintenance. For those also growing romaine in containers, cups, or outdoors in different climates, water culture indoors is a complementary approach that runs year-round regardless of season or outdoor conditions, which is one of its biggest practical advantages.
FAQ
Can I just top off the water instead of changing it every time?
No. For scrap regrowth, you should change the water every 1 to 2 days, and once you leave it more than that you are relying on the base’s stored energy, not active growth. If you want a true ongoing supply in water, move to a Kratky setup with nutrient solution instead of repeatedly refilling plain water.
What should I do if my romaine base smells bad or gets slimy?
If you are seeing smell and slime but the leaves still look okay, it is usually base rot from bacteria, and the fix is not “more time” but immediate water change plus a rinse. Remove the affected base, discard any mushy parts, and start over if the cut end is fully brown and mushy throughout.
How long will the store-bought scrap method keep producing leaves?
Use the dish method only as long as it keeps producing, typically about 2 to 3 weeks, then restart. After that window, the stored energy is usually depleted and you get more yellowing and weaker regrowth unless you transition to nutrients in a Kratky reservoir.
How many hours of light does romaine need when growing in water?
Aim for 14 to 16 hours of light for best indoor results, then give the plant a dark period. Running grow lights 24/7 can encourage bitterness and weak, stretched growth, especially if temperatures are warm.
Is it normal if my roots float or look tangled in the net cup?
A floating root “mat” is normal in a Kratky container as roots expand, but the upper solution surface should not be bright-lit for long. Keep the container opaque and ensure the net cup bottom sits so the roots can alternate between feeding below and getting oxygen above.
Can I move a rooted scrap from the dish method into a Kratky setup?
Yes, but do it intentionally. If you start with the dish method and want to switch, move the rooted base and any small roots into a Kratky net cup, then make sure the bottom of the net cup just touches nutrient solution. Avoid submerging the base deeper than intended because that can restart rot.
Why did my romaine get bitter, and does it come back?
Romaine can handle a bit of variation, but stay within a cool range. When the room is consistently above about 75°F, bolting risk jumps and leaves turn bitter, so you may need to relocate the setup away from ovens, direct sun, or sunny windows.
My romaine is yellowing, is it always a nutrient problem?
Often it is light, but the other common cause is nutrient absence. Yellowing within the first week usually points to insufficient light, while yellowing after a longer dish-period usually indicates nutrient depletion, so either increase light or add nutrients by switching to Kratky.
How warm or cold should the water be for growing romaine in water?
Yes. If the water feels too cold (below about 60°F for the solution), rooting slows or stops. Use room-temperature water for the dish method and keep the nutrient solution roughly in the mid-60s to low-70s Fahrenheit range for root health.
Can I grow romaine in a jar without net cups?
You can, but it is less forgiving. If you do not have net cups and an opaque reservoir for Kratky, you need a way to prevent algae and keep the cut base from sitting too deep. Without that control, you will be more dependent on frequent water changes and good light.
Algae keeps coming back in my setup, what’s the real fix?
If you see heavy algae, the container is likely letting light reach the nutrient solution, or the reservoir was not fully cleaned at the last change. Fix it by switching to an opaque container, covering gaps around cups, and doing a full clean and refill rather than just skimming algae.
Do I need to measure pH every time I refill nutrient solution?
A simple pH meter or strips help, but do not obsess if you cannot test. What matters most is using the correct nutrient mix and refreshing on schedule, because salt buildup and pH drift can cause persistent poor growth that “light changes” will not solve.